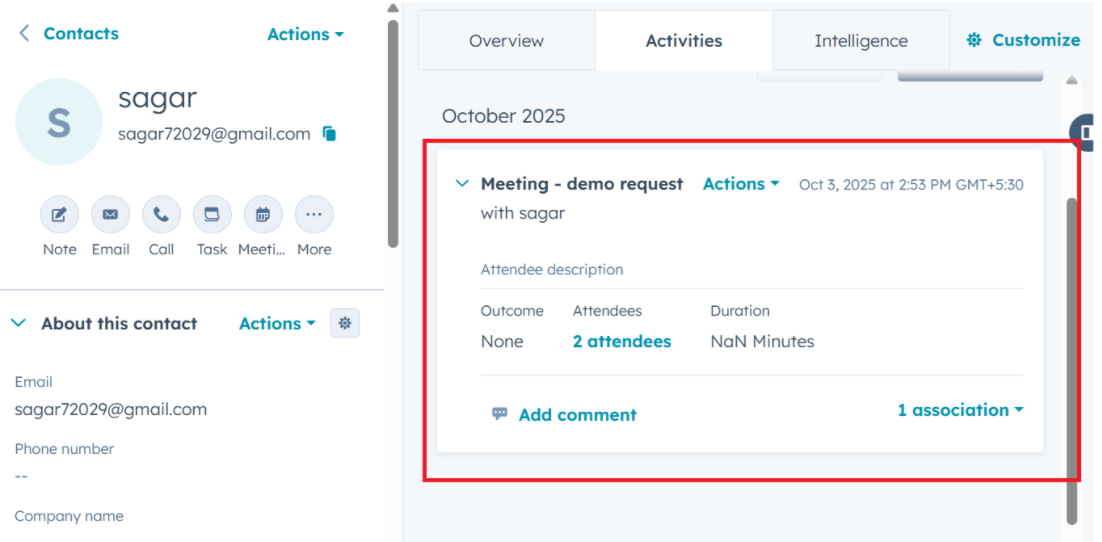
Integrating HubSpot CRM with Omni24 to creates a seamless workflow where contacts automatically sync to eliminate manual data entry and ensure your team always has complete customer context.
HubSpot CRM is a powerful customer relationship management platform that helps businesses organize contacts and manage relations in one unified platform.
Connecting HubSpot CRM with Omni24
The integration process takes just a few clicks by which you can easily manage customer relationships efficiently.
Step 1: Navigate to Settings from Omni24 dashboard > Integrations to access all available third-party connections.
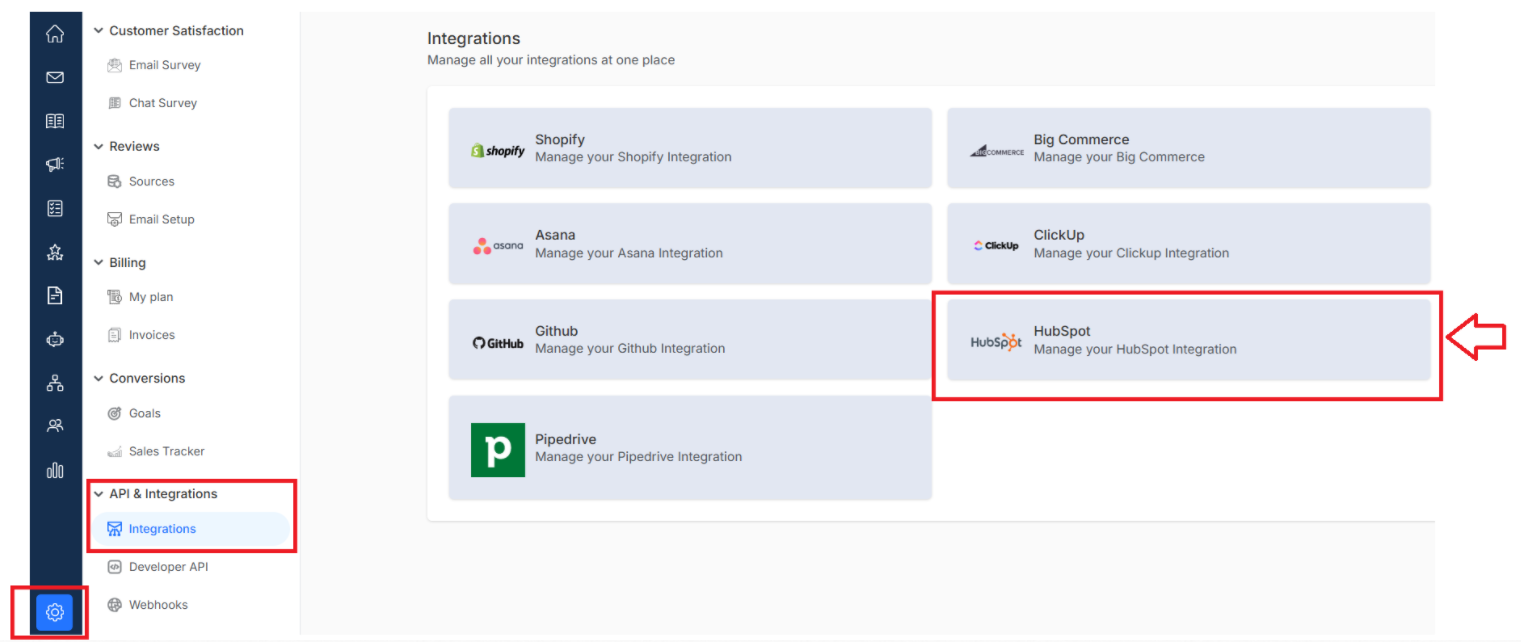
Step 2: Find HubSpot in your available integrations. Click on Connect HubSpot to begin the authorization process.
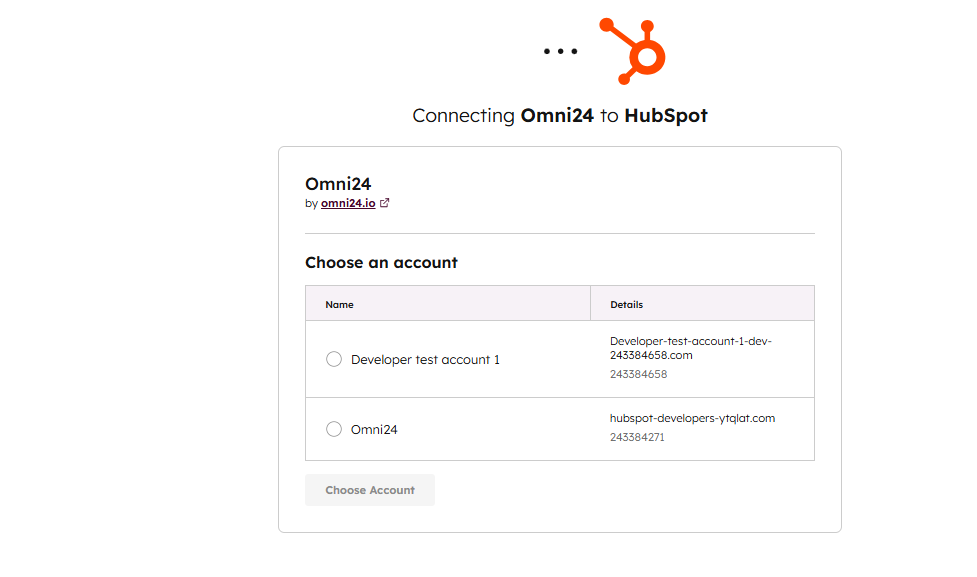
Step 3: Select the HubSpot account you want to link when the authorization window appears.
Note: If you do not have any existing HubSpot CRM account, you can create for here also
Step 5: Confirm the connection from the omni24-hubspot integration interface and all the inbox that are synced
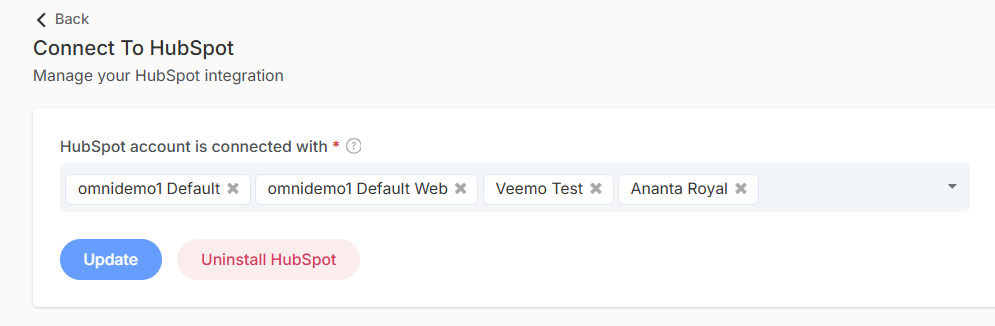
Your HubSpot CRM is now successfully connected with Omni24 and all your contacts will start flowing seamlessly.
Advantages of this Integration
Creating New Contacts
When you're chatting with a new contact whose profile is not in your HubSpot yet, you can create their contact profile efficiently without switching between platforms
Important: If contact profiles already exist in your HubSpot account, they will automatically sync to Omni24 once the integration is active.
Step 1: Open any conversation in your Omni24 Inbox to view the customer interaction and access the contact creation option.
Step 2: Look at the right sidebar where contact information appears and click the HubSpot icon
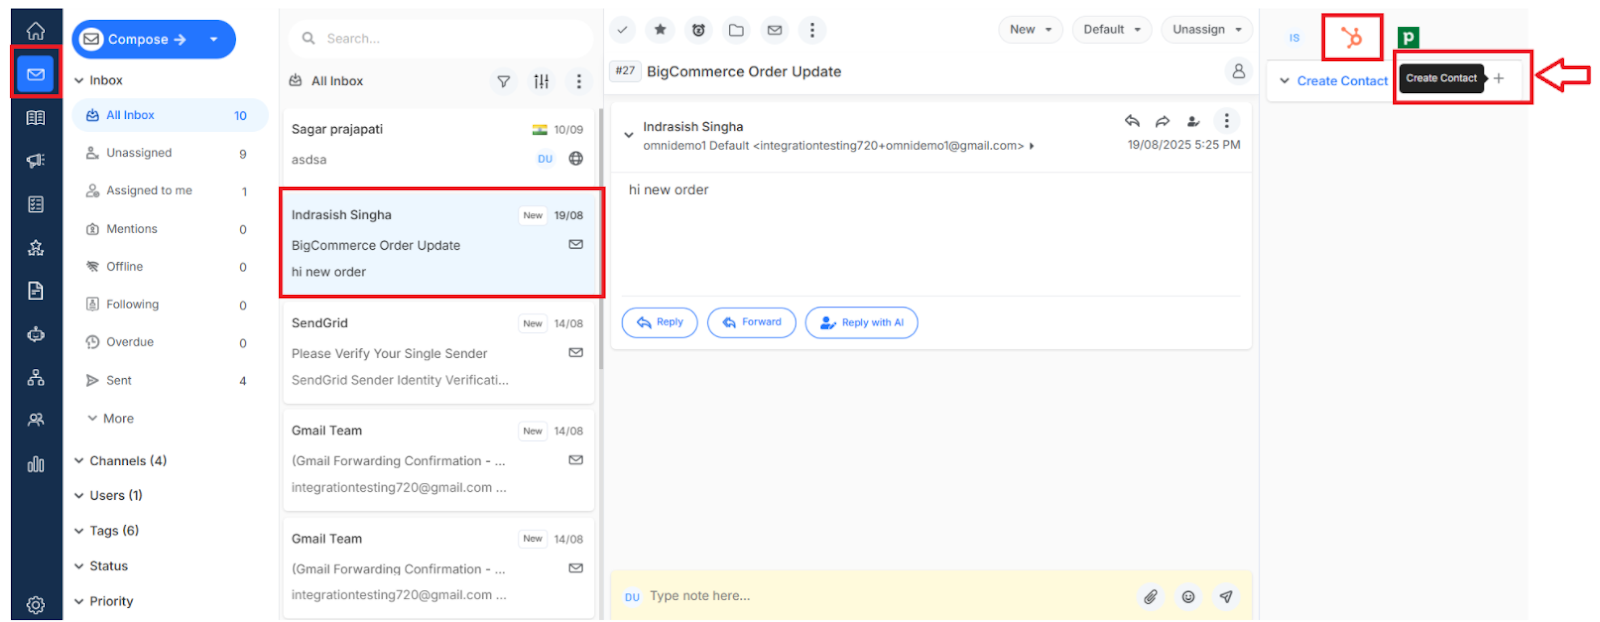
Step 3: Click on Create Contact button to open the contact creation form.
Note: The email address is the key identifier for syncing. If a customer interacts using one email address (e.g., john@company.com), but you create a HubSpot contact using a different email (e.g., john.personal@gmail.com), these won't sync together. Always ensure you are using the same email in both platforms.
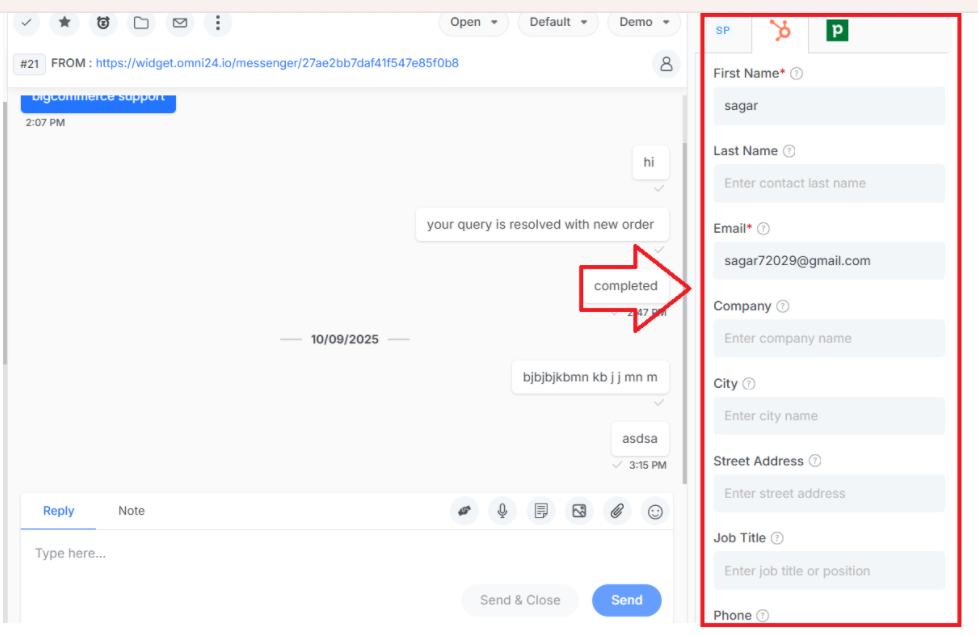
Step 4: A contact creation form will appear with the following fields to capture complete information:
- First Name - Enter the contact's name for personal identification.
- Last Name - Enter the contact’s last name to complete full identification.
- Email - Enter the primary email address serves as the unique identifier for syncing.
- Company - Name of the organization the customer is affiliated with.
- City - City where the customer is located.
- Street Address - Complete physical address for location-based activity.
- Job Title - Contacts a role or position to understand their decision-making authority.
Phone - Contact phone number for alternative communication.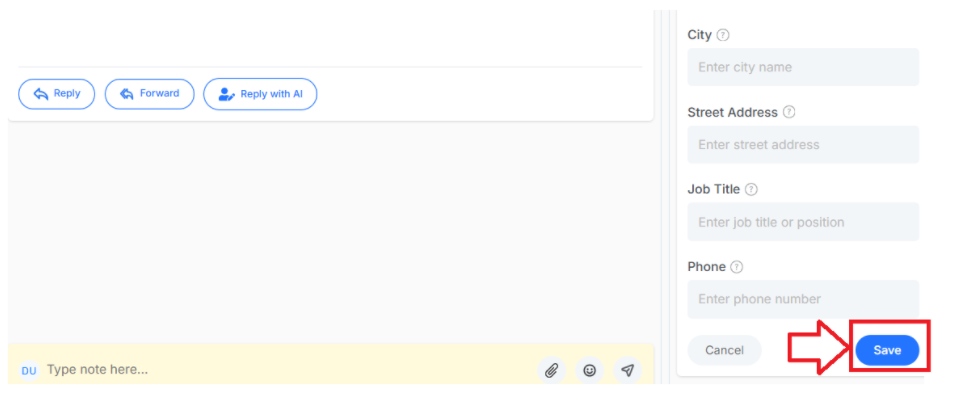
Once done, click Save to create the contact and sync the contact in HubSpot.
Updating Existing Contacts
Update their details of existing contact, and the changes will reflect in HubSpot automatically without any additional steps.
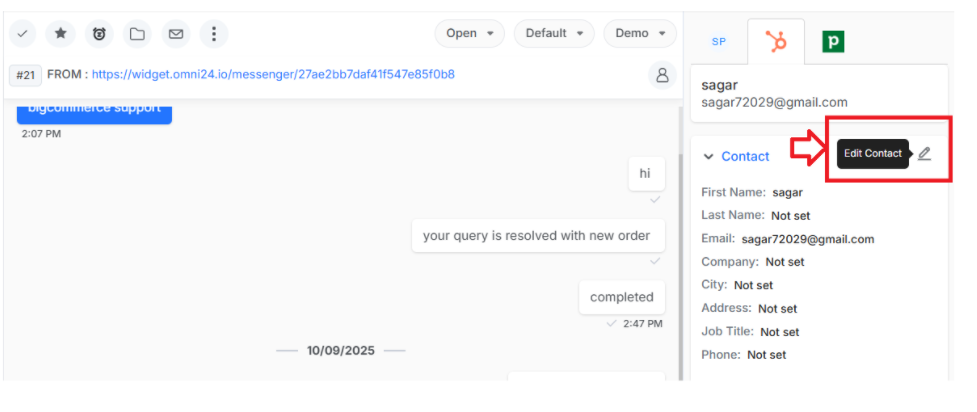
- To update any contact details, open the conversation
- Click on the edit icon button the right sidebar to access the edit option for the profile
- Modify any field you need with the updated information
Click Save to sync changes immediately to HubSpot.
Creating Company Profiles
You can sync company information directly to HubSpot from any conversation to make it easy to build your database while you effectively engage with clients.
Step 3: Click on the button beside the company section and a company profile creation form will open to enter all necessary fields.
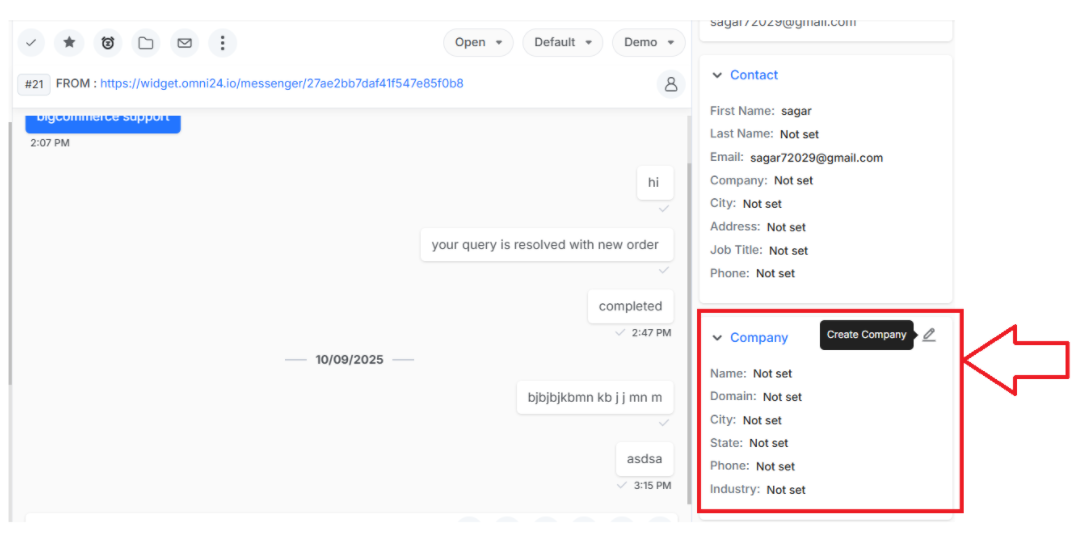
- Company Name - Registered business name for proper communication
- Phone Number - Enter the company contact number.
- Industry - Select the business sector from the dropdown menu to classify company type.
- City - Enter the city where the company is located.
- State/Province - Geographic region, state or province to complete the company's information.
- Website Domain - Enter the company's website URL for online presence reference and verification.

Click Save to create the company profile, which will be synced to HubSpot databases.

Creating Deals
Spot a sales opportunity during a prospect conversation? Create a deal right from their conversation to capture it when the context is fresh and track it through the pipeline.
Step 1: Click on Create Deal or the + icon from the right side profile section of HubSpot to open the deal creation form.

Step 2: Complete the deal creation form with all relevant sales opportunity information:
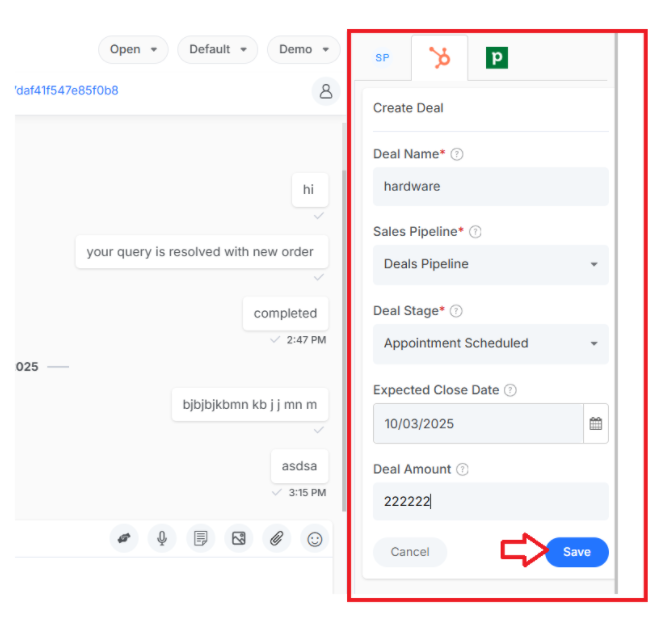
- Deal Name - Enter a descriptive title that identifies this sales opportunity.
- Sales Pipeline - Select which sales pipeline the opportunity belongs to based on your deal categorization
- Deal Stage - Choose where the deal stands in current stage of your sales process.
- Expected Close Date - Select the projected date when expected the deal closure
- Deal Amount - Potential revenue value to forecast expected income.
Once done, click Save to create the deal which will be tracked in HubSpot .
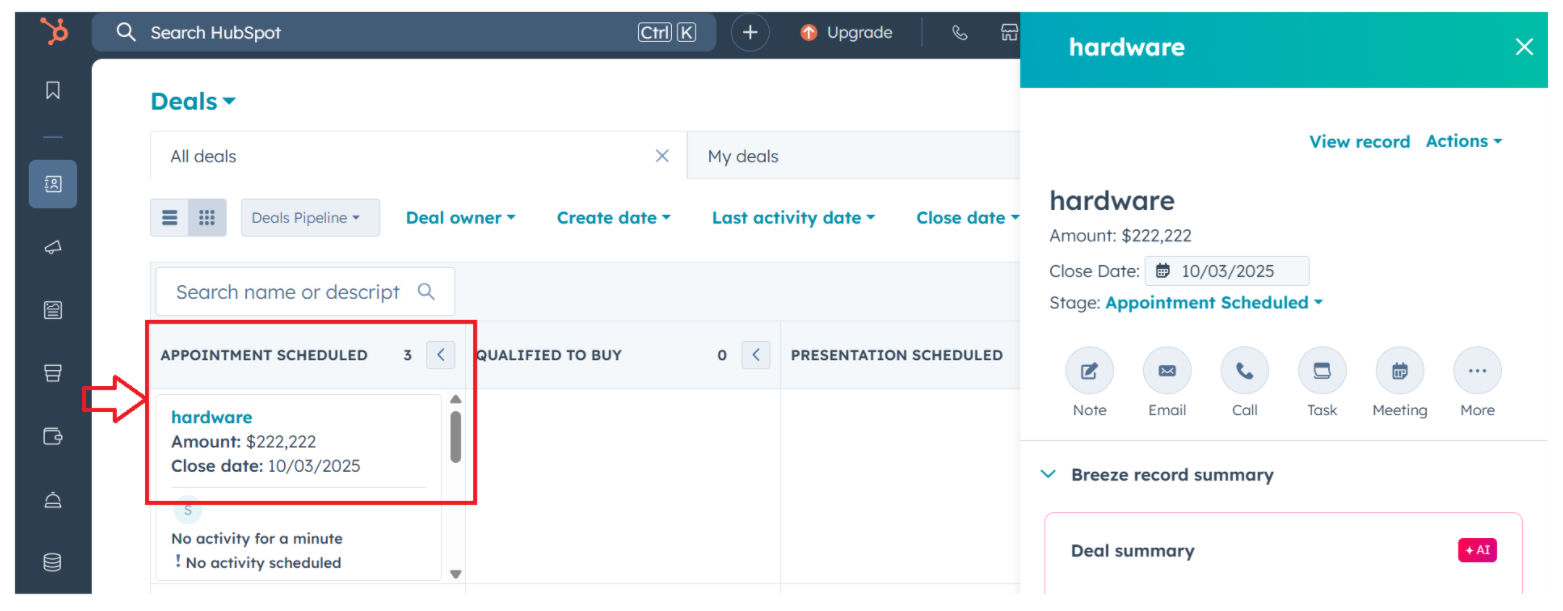
In Omni24,
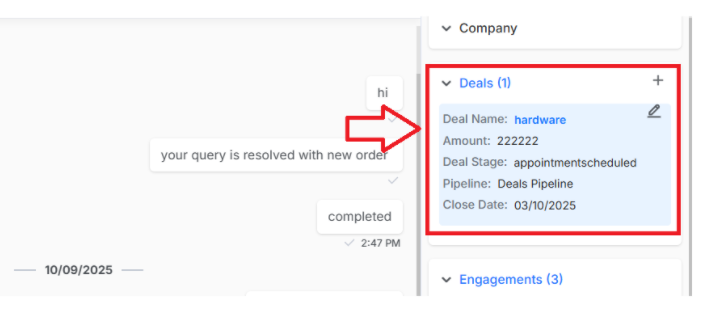
Creating Engagements
Engagements help you document interactions, set reminders and schedule follow-up all synced for complete activity tracking.
1. Adding Notes
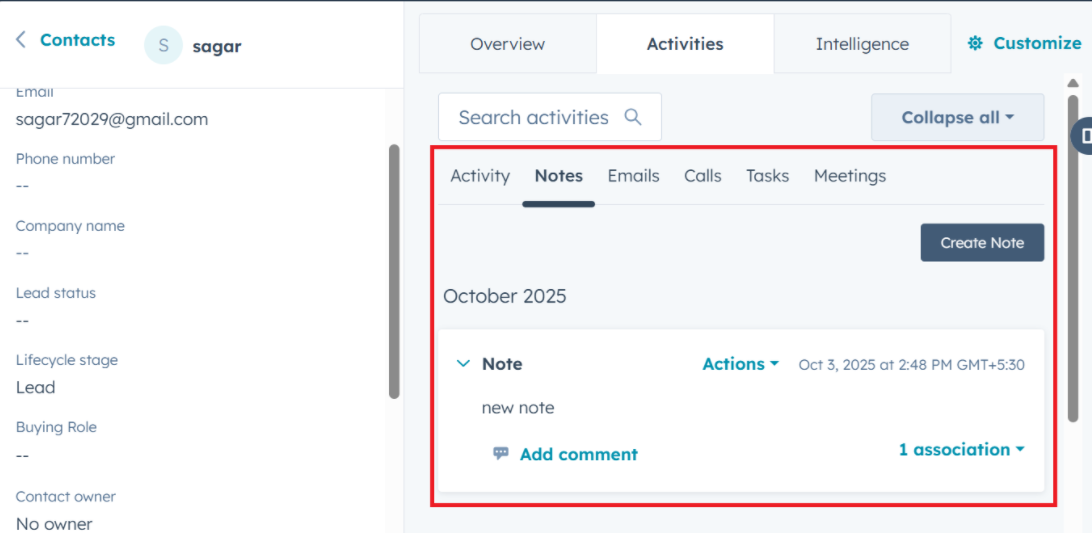
Notes let you capture important details, observations, or context from customer conversations that your team can reference later for better service continuity.
Step 1: Select which contact profile you want to add information or observations.

Step 2: Click on the + icon beside engagement to open the engagement creation form with type selection.
Step 4: Select Note from the Type dropdown menu and write detailed notes, or important context from the customer interaction
Click Save to store the note in both Omni24 and HubSpot for easy access and reference.
2. Creating Tasks
Select Task from the Type dropdown menu to create an item with a specific objective or follow-up requirement.
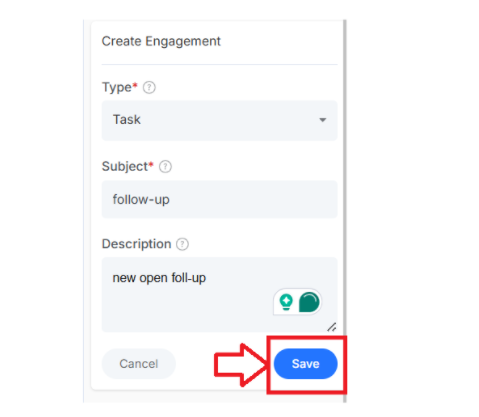
Fill in the task details to clearly define what needs to be done:
- Title - Enter description that summarizes what needs to be accomplished
- Description - Provide additional details or instructions about the task.
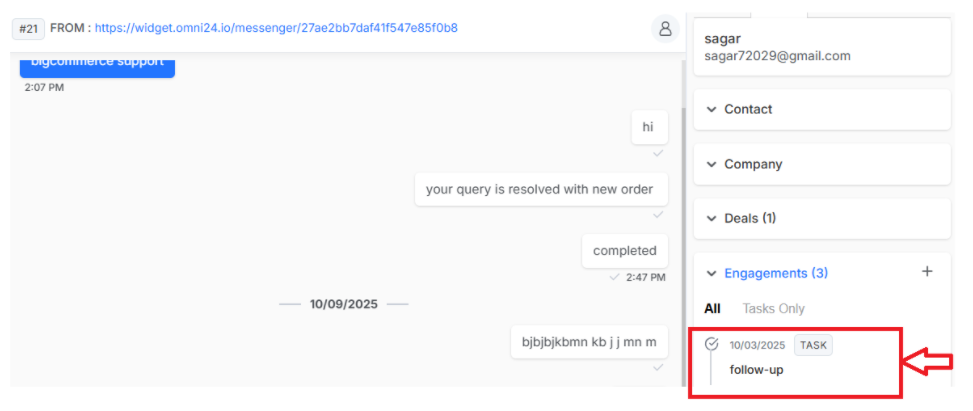
Click Save to create the task which will be synced for tracking and management.
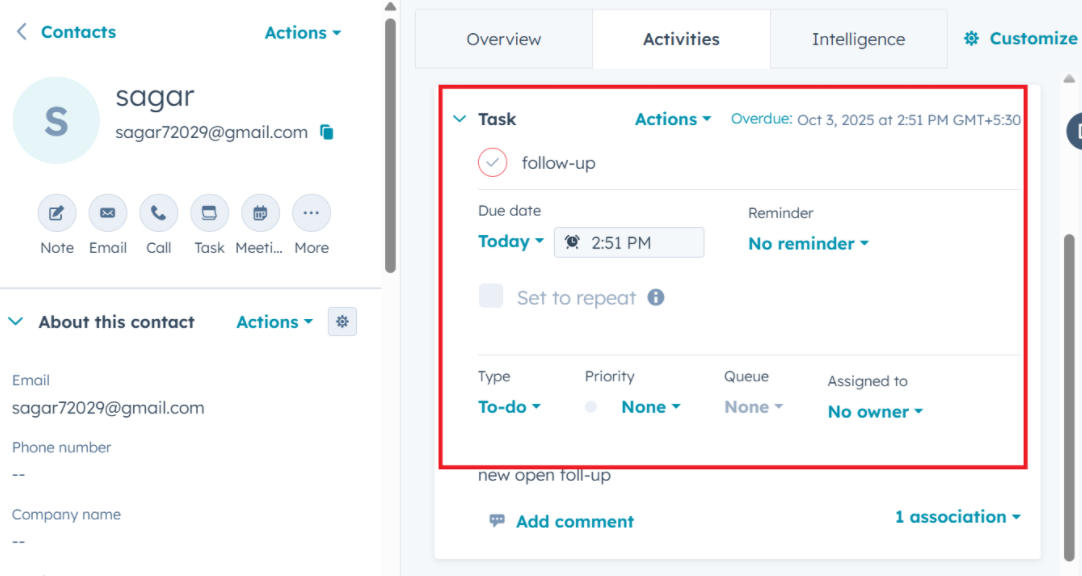
In Omni24,
3. Scheduling Meetings
Select Meeting from the Type dropdown menu to indicate you're scheduling a synchronous interaction.
Enter meeting information to provide clear details and its purpose for all participants:
- Title - Enter the meeting topic to clearly communicate what will be discussed during this interaction
- Description - Provide the meeting agenda or additional context.
Click Save to schedule the meeting, which will be synced between Omni24 and HubSpot for visibility.