ClickUp is an advanced project management platform that centralizes tasks and workflows. It offers teams tools for organizing projects and tracking progress efficiently across departments.
The integration creates seamless ticket-to-task conversion workflows and improves response times. Teams gain better visibility into support requests while maintaining organized project management.
Why connect Omni24 with ClickUp?
- Convert challenging support tickets into ClickUp tasks for specialized team members to resolve
- Transform customer feature requests into ClickUp tasks within product development workflows for prioritization
- View ClickUp task progress directly from support conversations to update customers on resolution timelines accurately
Connecting ClickUp with Omni24
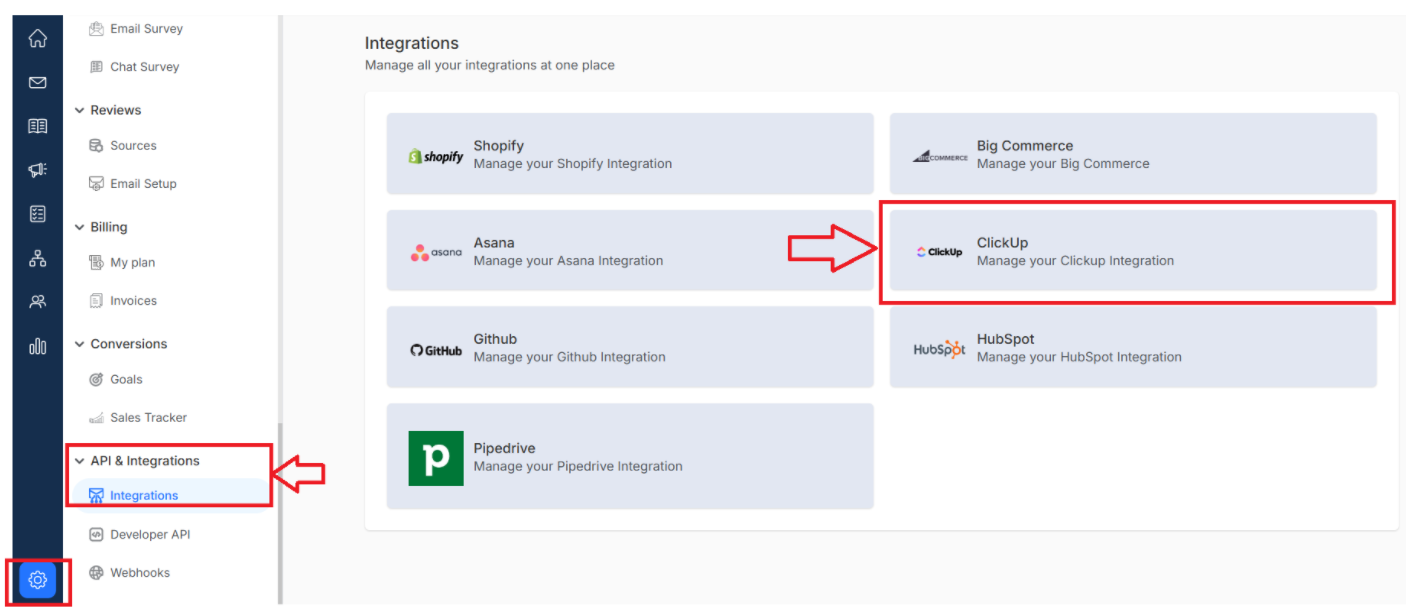
Step 1: From your Omni24 dashboard, navigate to Settings > API & Integrations > Integrations to view all available third-party integrations.
Step 2: Locate the ClickUp integration and click on it to view the integration details and connection options.
Step 3: Click the "Connect ClickUp" button to begin the authorization process
Step 4: A "Connect to ClickUp" page appears. Select which Omni24 inbox you want to connect with ClickUp from the dropdown menu.
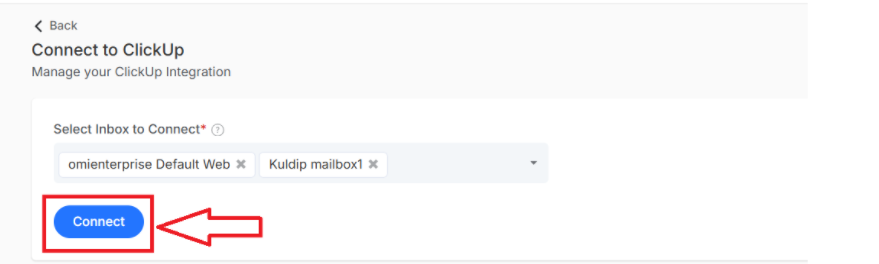
Once you've selected your inbox, click the "Connect" button to proceed to ClickUp authorization.
Step 5: You'll be redirected to the ClickUp Account selection page, where you have to select an account and click on Connect Workspace
You will now be redirected to the Omni24 account, where you will be notified that ClickUp successfully connected
How to Create a ClickUp Task from a Customer Conversation
After integrating ClickUp with Omni24, you can easily create tasks within ClickUp from customer conversations. Teams can attach entire conversations to tasks for better context.
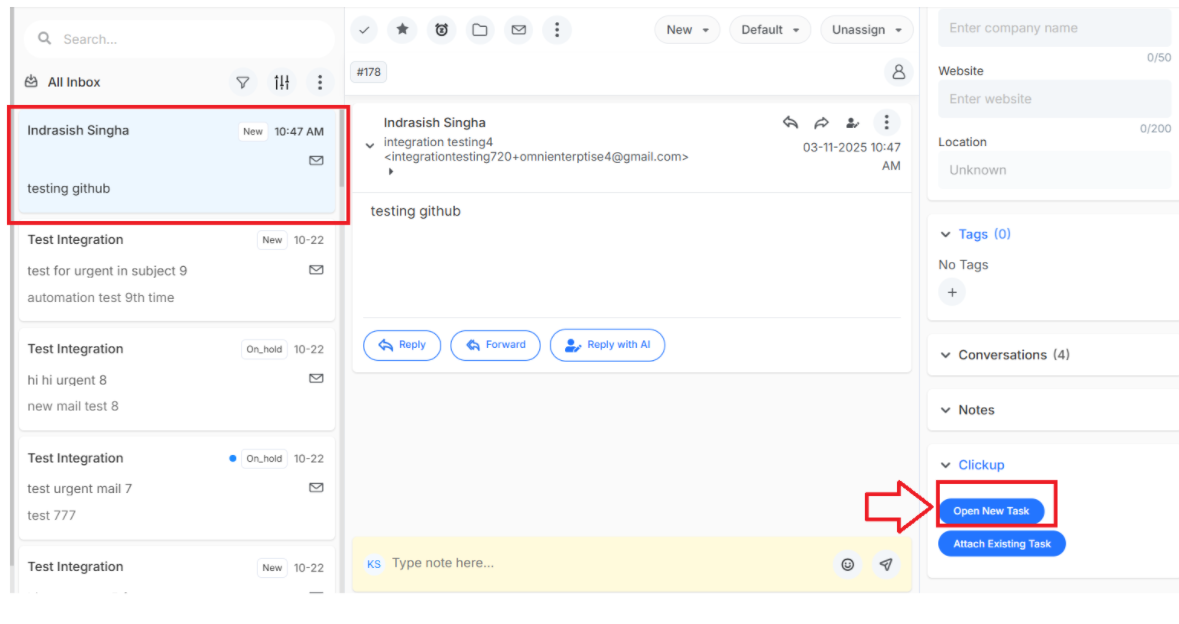
Step 1: Navigate to Inbox > Customer conversation for the Conversation list for which you want to create a ClickUp task.
Step 2: Under the customer profile from the right profile panel, click on the ClickUp dropdown list
Step 3: Select “Open New Task” to create a new task in ClickUp from a customer conversation
Step 4: A pop-up page appears as “create new task” where you need to enter the details
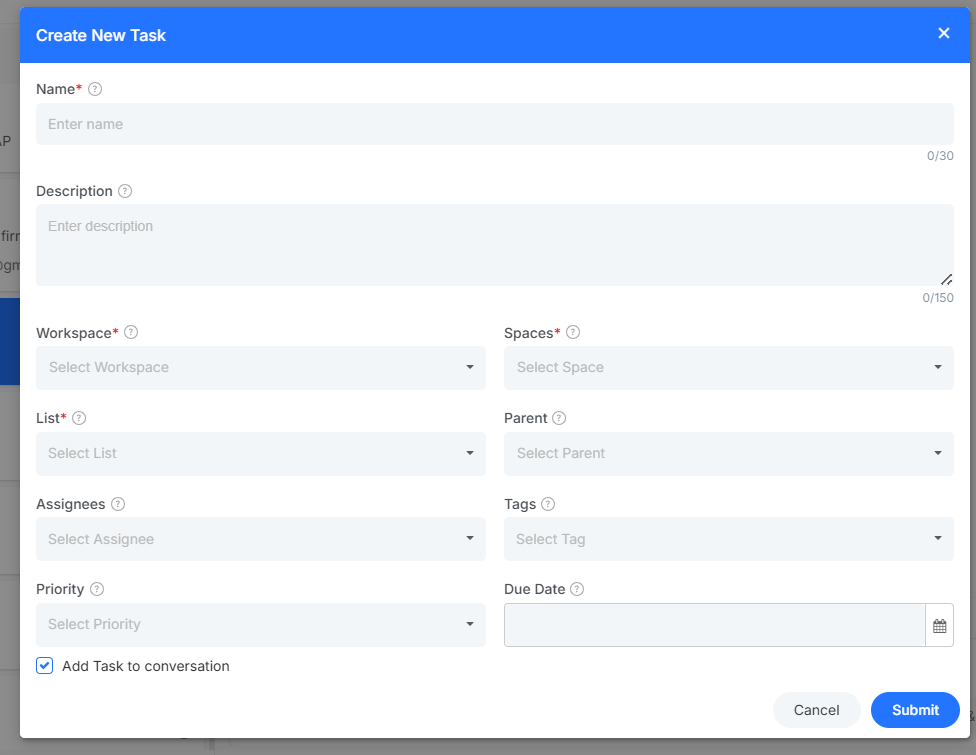
Essential fields to consider:
- Name: Title for the task based on the customer conversation
- Description: Detailed description of the problem or request
- Workspace: ClickUp workspace where the task will be created
- Space: Specific space within your workspace for task categorization
- List: Pick the appropriate list to organize similar customer-related tasks
- Parent: Link this task to a Main task or project
- Assignees: Assign team members for resolving the customer issue
- Tags: Relevant labels for easy task filtering and organization
- Priority: Urgency level of the task based on conversations
- Add Task to conversation: This checkbox links the task directly to the customer conversation to ensure all context remains accessible for seamless tracking.
Once done, click on “Submit”.
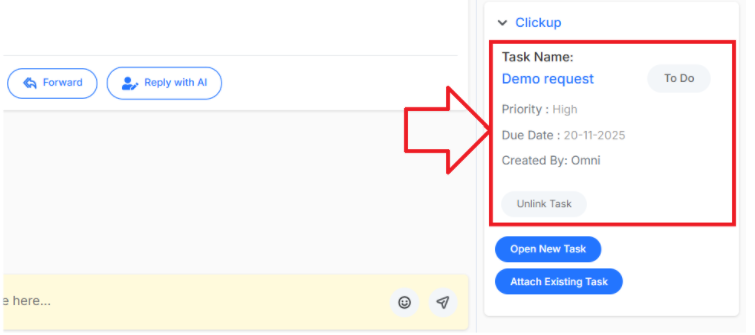
Note: You can also unlink a task from the conversation by clicking on “Unlink Task.”
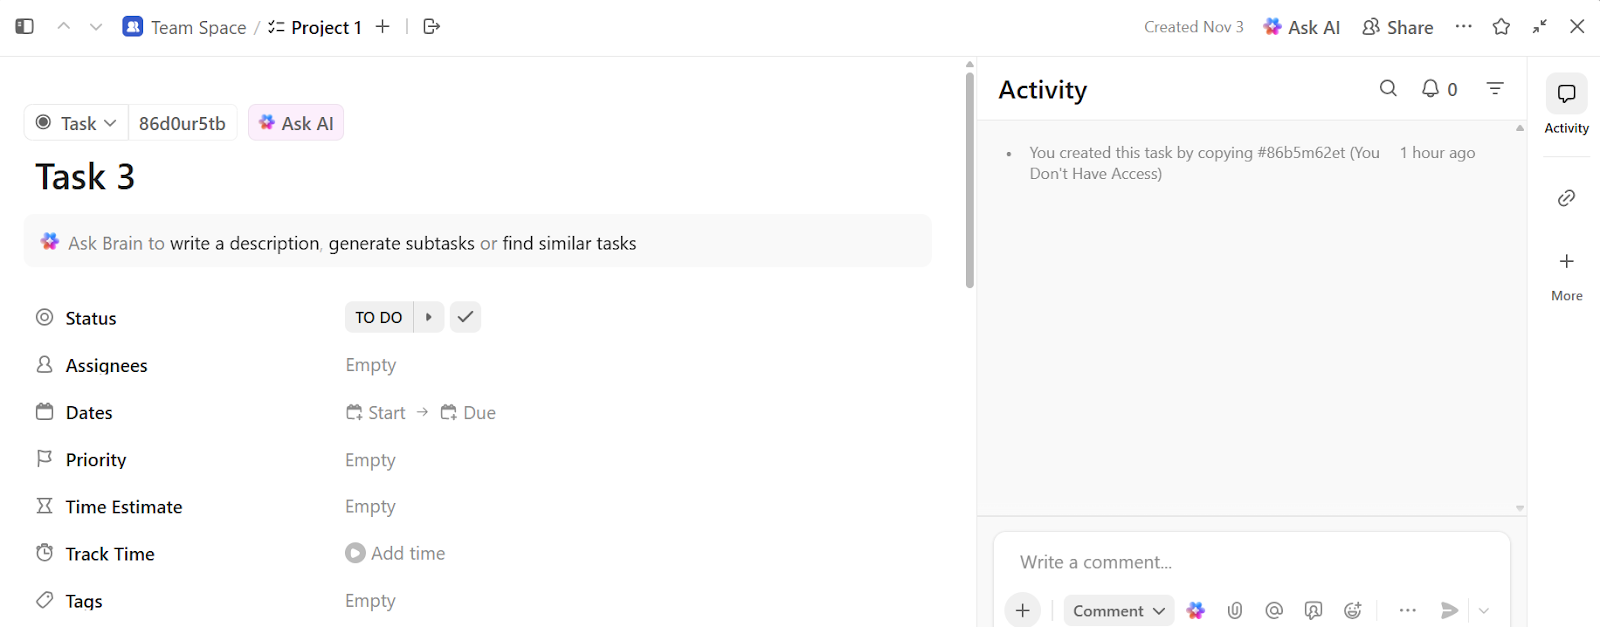
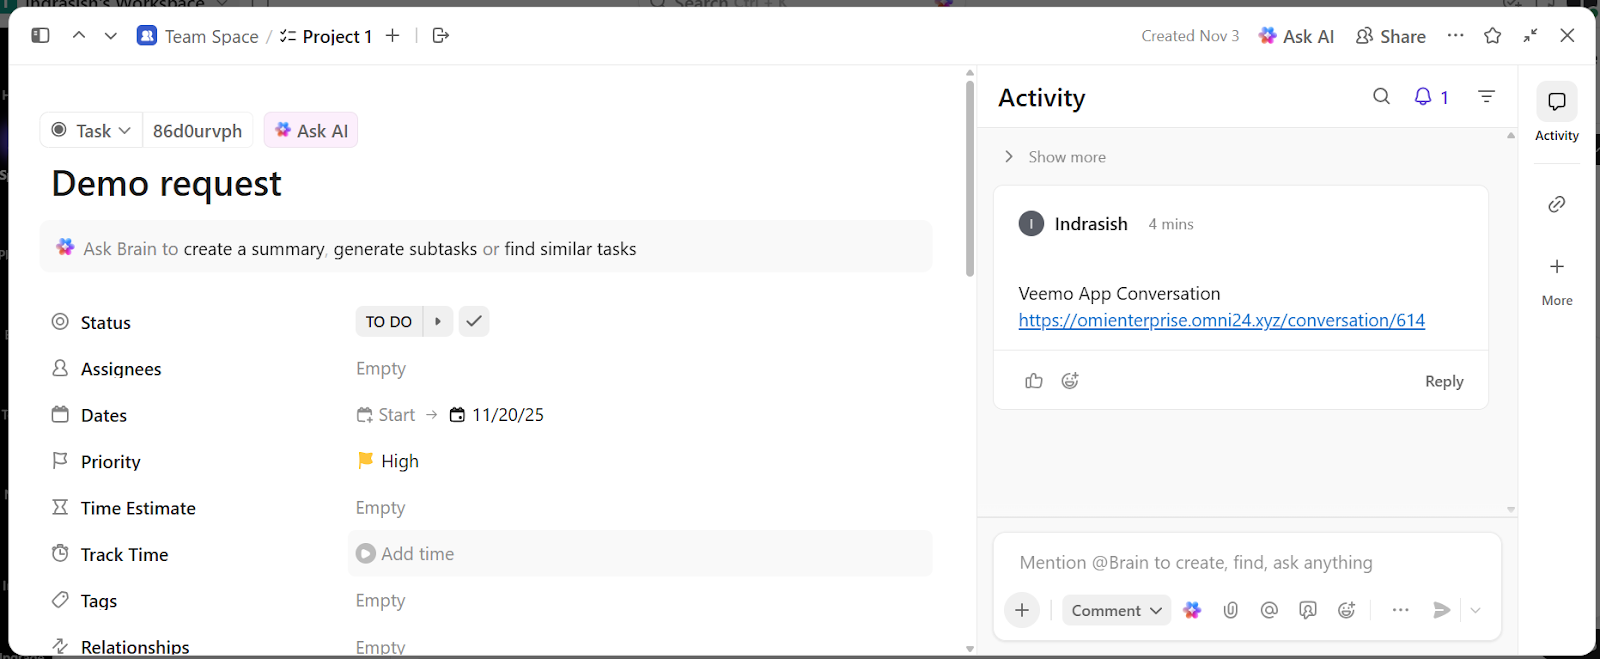
In ClickUp, you can see a new task created from Customer Conversation as
Attach Existing ClickUp Task with a Conversation
Connect support tickets with existing ClickUp tasks for project continuity and prevent duplicate work. It is essential when multiple customers report similar issues or when tickets relate to ongoing technical work already being tracked.
Step 1: Under the ClickUp task drop-down list in the right profile panel of the Omni24 inbox, click on the “attach existing task” button
Step 2: A pop-up page appears as “attach existing task” where you need to enter the details
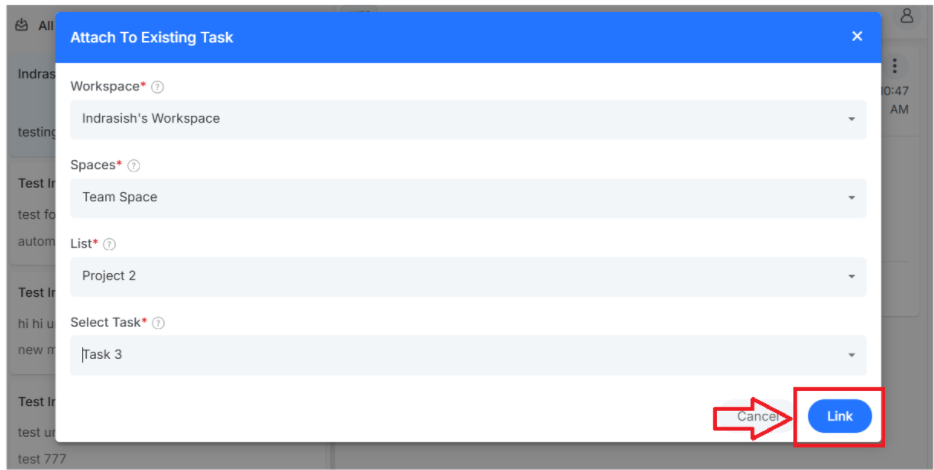
Field to consider:
- Workspace: ClickUp workspace containing your existing task
- Space: Specific space within the selected workspace where task is present
- List: List that includes the task you want to link to the conversation
- Select Task: choose the specific existing task from the results based on workspace, space and selected list
Once done, click on “link”. To successfully link an existing ClicpUp task with a conversation. In Omni24, you can view it as
In Asana, you can see the existing tasks assigned to the conversation from Omni24 as