Asana is a powerful project management platform that helps teams organize tasks and collaborate effectively. Integrating Asana with Omni24 enables real-time ticket-to-task conversion. It helps teams to gain enhanced visibility into customer issues while streamlining resolution workflows efficiently.
Integrating Asana with Omni24 enables real-time ticket-to-task conversion. It helps teams to gain enhanced visibility into customer issues while streamlining resolution workflows efficiently.
Why connect Veemo Support and Asana?
- Convert Tickets to Tasks - Transform customer support tickets into actionable Asana tasks for proper tracking and accountability
- Consolidate Customer Feedback - Link multiple customer complaints to existing Asana tasks to measure issue impact and prioritize fixes
- Cross-Team Collaboration - Enable support and development teams to work from unified data, ensuring customer issues reach the right specialists
Connecting Asana with Omni24
Step 1: From your Omni24 dashboard, navigate to Settings > API & Integrations > Integrations to view all available third-party integrations.
Step 2: Locate the Asana integration and click on it to view the integration details and connection options.
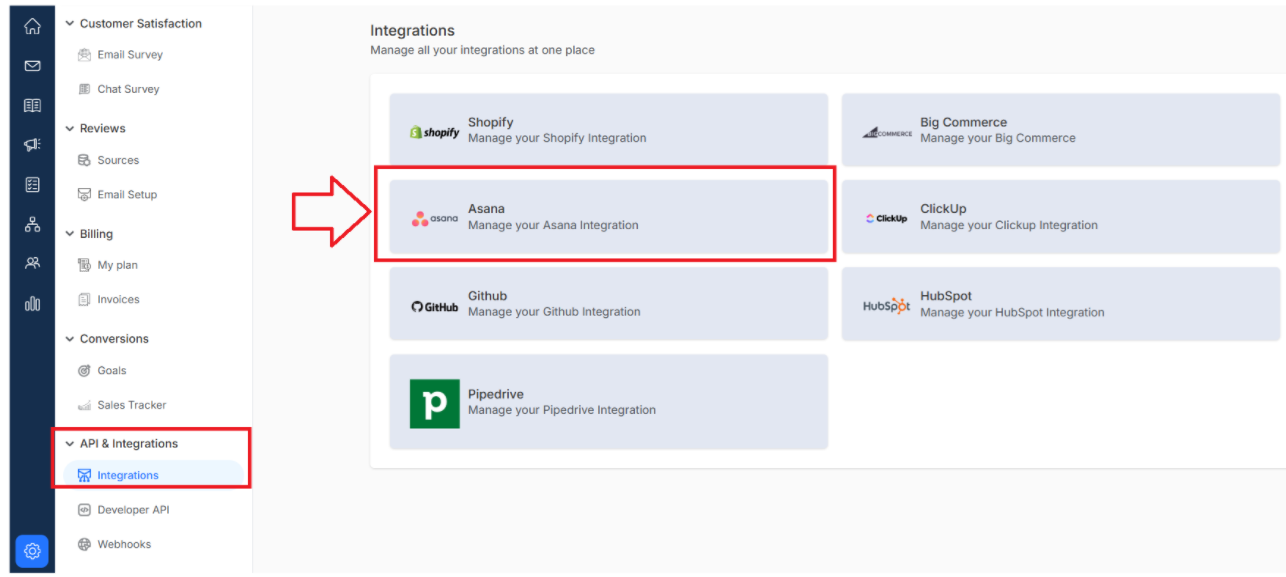
Step 3: Click the "Connect Asna" button to begin the authorization process
Step 4: A "Connect to Asana" page appears. Select which Omni24 inbox you want to connect with Asana from the dropdown menu.
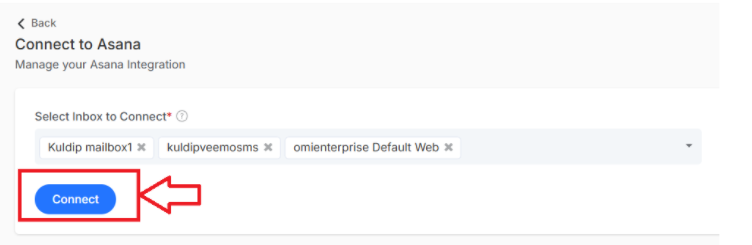
Once you've selected your inbox, click the "Connect" button to proceed to Asana authorization.
Step 5: You'll be redirected to Asana’s authorization page titled Grant all permissions to connect successfully
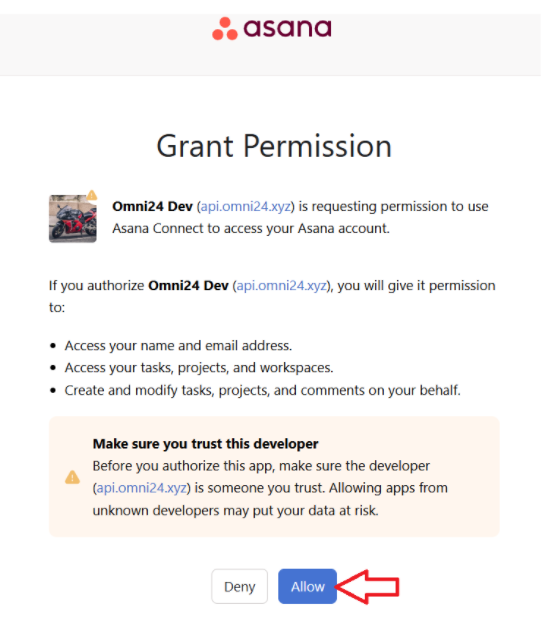
Review the permissions carefully and click on “Allow” to complete the connection.
Your Asana account is now successfully integrated with Omni24 with all the selected inboxes.
How to Create an Asana Task from a Customer Conversation
After integrating Asana with customer service software, you can easily create tasks directly from customer conversations. You can attach Conversations to tasks, providing complete context for efficient resolution.
Step 1: Navigate to Inbox > Customer conversation for the Conversation list for which you want to create an Asana task.
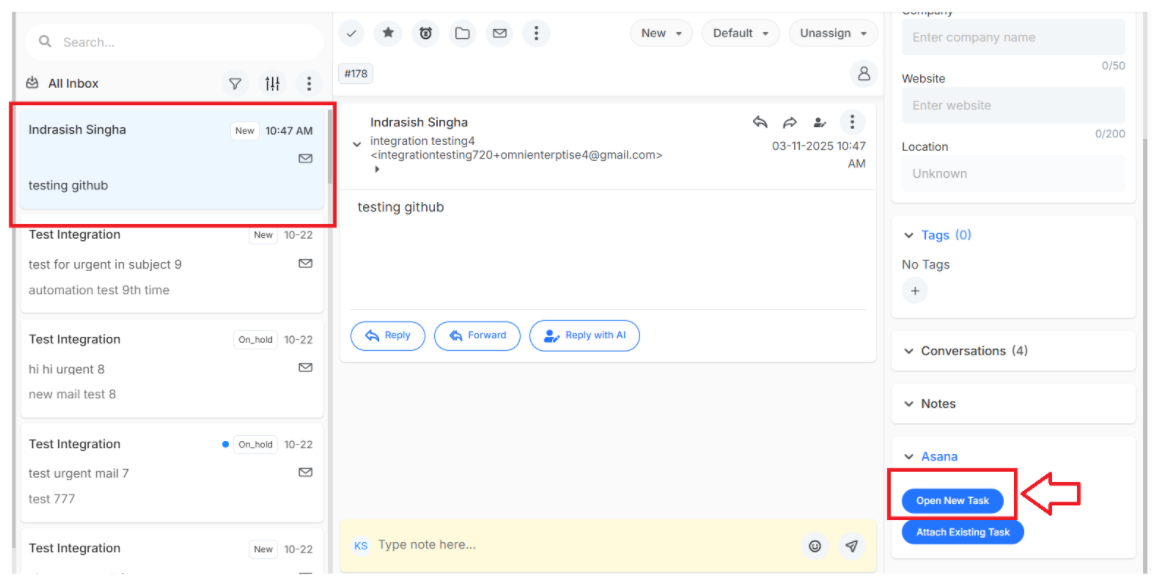
Step 2: Under the customer profile from the right profile panel, click on the Asana dropdown list
Step 3: Select “Open New Task” to create a new task in Asana from a customer conversation
Step 4: A pop-up page appears as “create new task” where you need to enter the details
Note: these details will be related to the project and workspace to which the task belongs
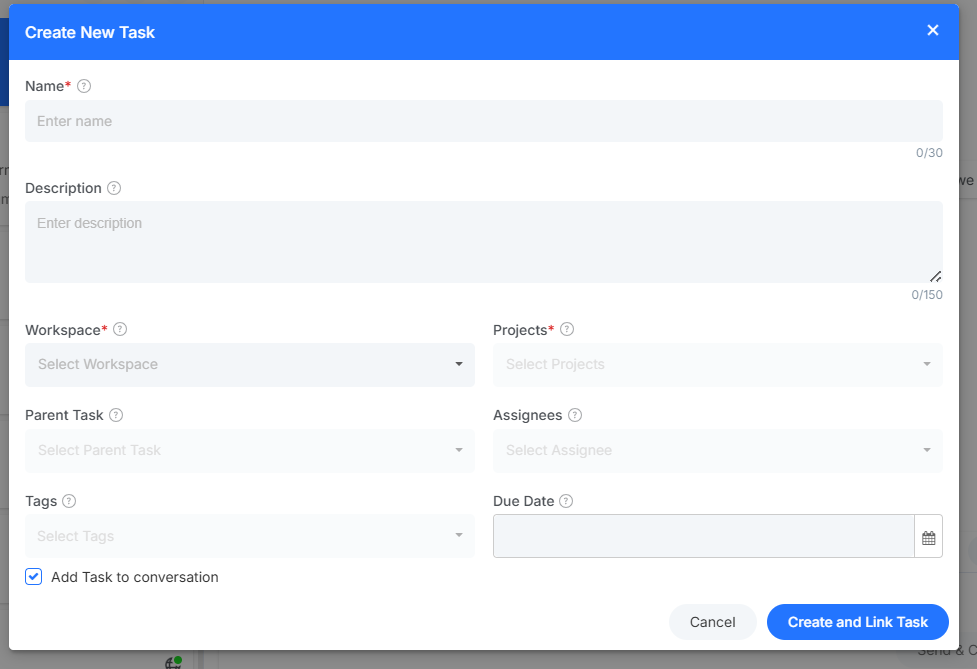
Fields for creating tasks:
- Name: Title for the task based on the customer issue
- Description: detailed context about the customer's issue.
- Workspace: Asana workspace where the task should be created
- Projects: Relevant projects to categorize the task for better organization.
- Parent Task: Link to a larger task if it is a part of a broader issue.
- Assignees: Assign agents to handle the task.
- Tags: Add labels for easy filtering and quick identification.
- Due Date: Set a deadline for task completion based on SLA
- Add Task to conversation: Enable this checkbox to link the created task with the original conversation for context tracking.
Once done, click on “create and link task”. You view it from the left profile menu as new task linked

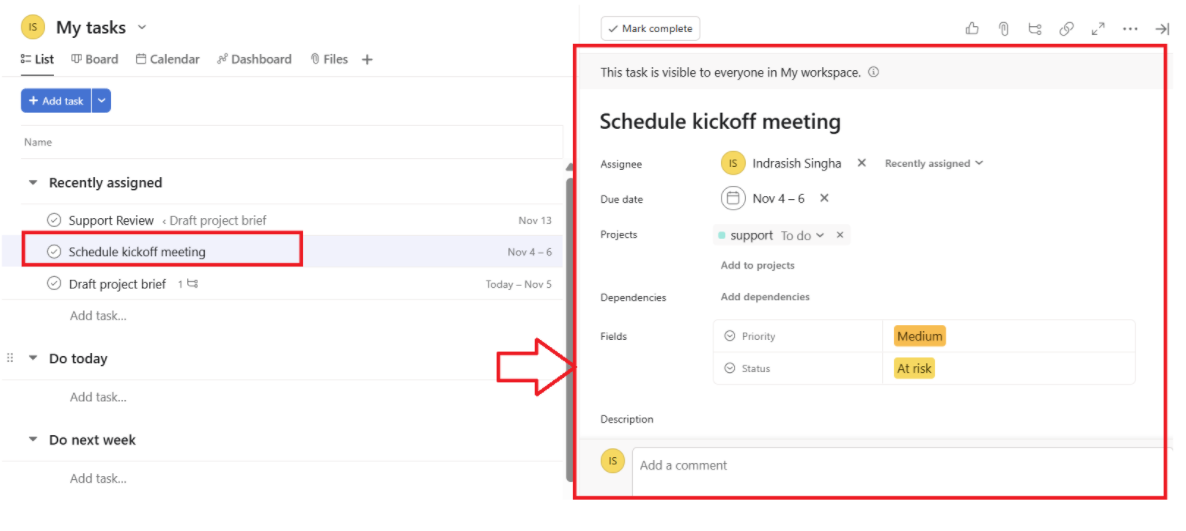
In Asana, you can see a new task created from Customer Conversation as

Attach Existing Asana Task with a Conversation
Step 1: Under the Asana task drop-down list in the left profile panel of the Omni24 inbox, click on “attach existing task” button
Step 2: A pop-up page appears as “attach existing task,” where you need to enter the details
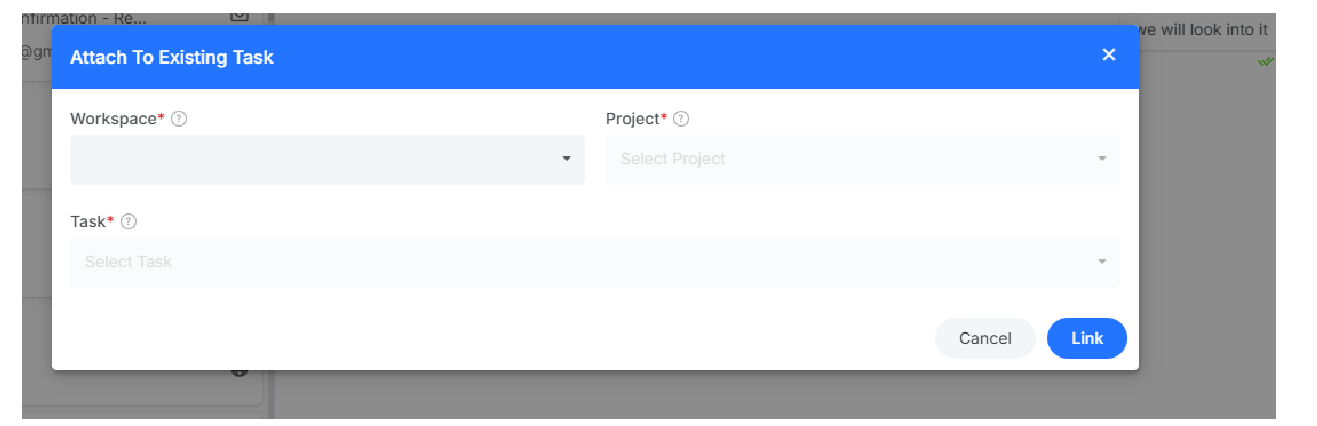
fields for attaching conversations to existing tasks:
- Workspace: Select the Asana workspace where the existing task is located. It helps narrow down the available tasks to choose.
- Project: A Specific project containing the task you want to link to further filters the task list.
- Task: Existing task from the dropdown menu that relates to the customer conversation. This could be a previously created task that this conversation should connect.
Once done, click on “link”. To successfully link an existing Asana task with a conversation
In Asana, you can see the existing tasks assigned to the conversation from Omni24 as