
With Omni24, you can easily organize your customer service team by adding users, assigning roles and creating focused teams. Streamline collaboration and ensure proper access levels to deliver exceptional customer experiences. Lets explore the process in detail
Set up and Manage User Accounts
Users are generally your organization’s members for great customer service! As an owner or admin, you can easily bring your team members into Omni24 to achieve customer satisfaction. This guide will walk you through adding and managing your team members so everyone can work together seamlessly.
Add New User Account
Ready to grow your support team? Your team members will be the ones chatting with customers, solving problems, and creating those amazing experiences that keep people coming back. Here's how to get them set up in Omni24. It's easier than you think!
Step 1: Head over to Settings > My Organisation> Users > Add, you will find it right in your main menu.
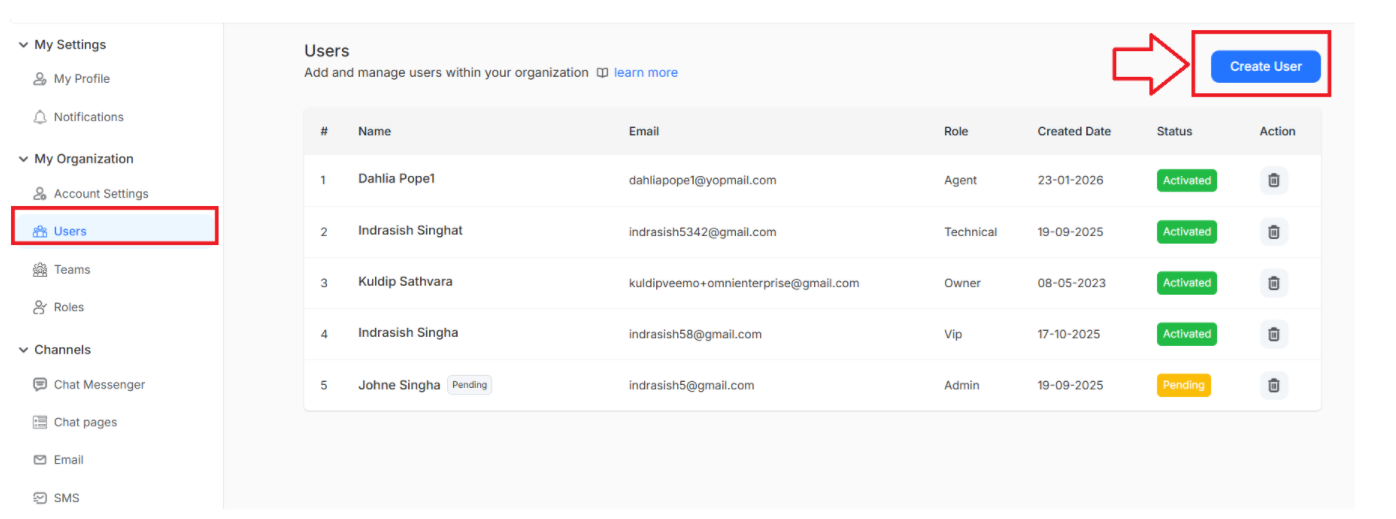
Step 2: Fill in your teammate's details and hit Create
You're almost there! Here's what you'll need:
- First name - What should you call them?.
- Last Name - Their full name helps keep things organized.
- Phone no - Phone no. of new user along with country code.
- Email - Where they'll receive their welcome invitation.
- Inbox - Choose which customer conversations they'll handle
- Role - Set their permissions based on what they'll be doing
Note: You can add customer roles other than the predefined roles. Click Here to know detailed about Roles and Permissions
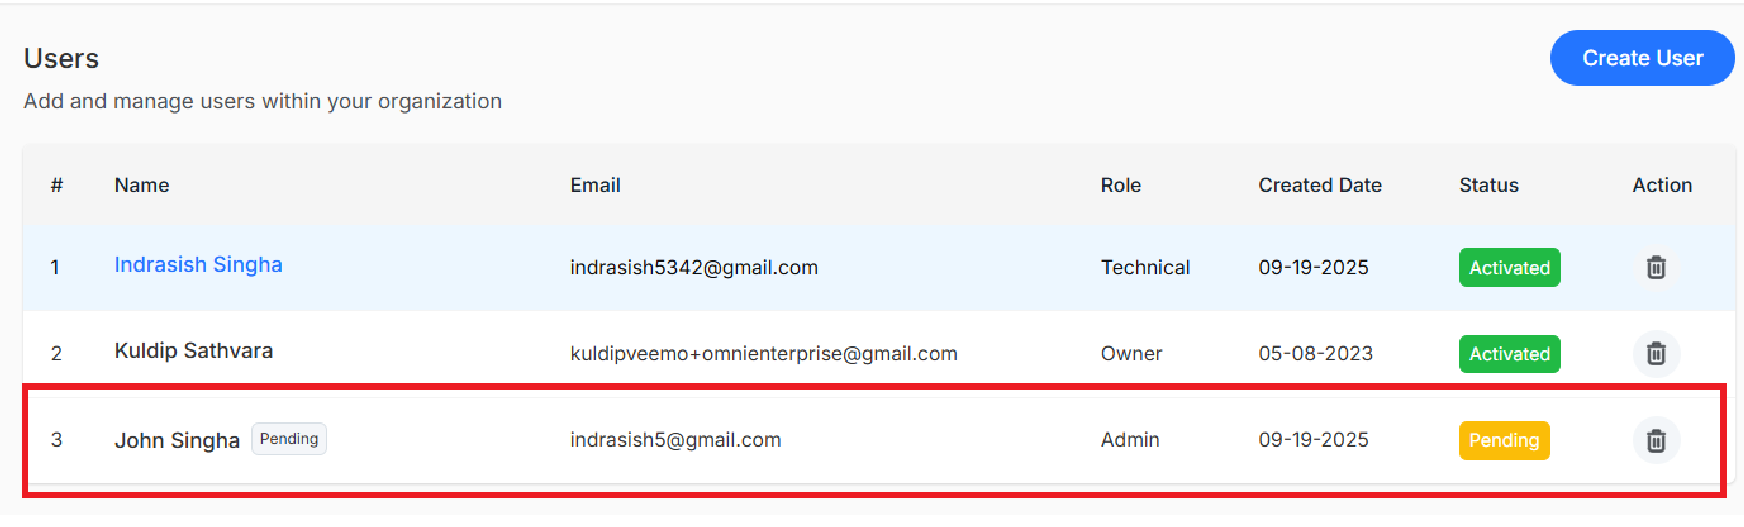
Important: After you send the invitation, you'll see "Pending" next to their name; that's normal! Once they click the invitation link in their email, that status disappears.
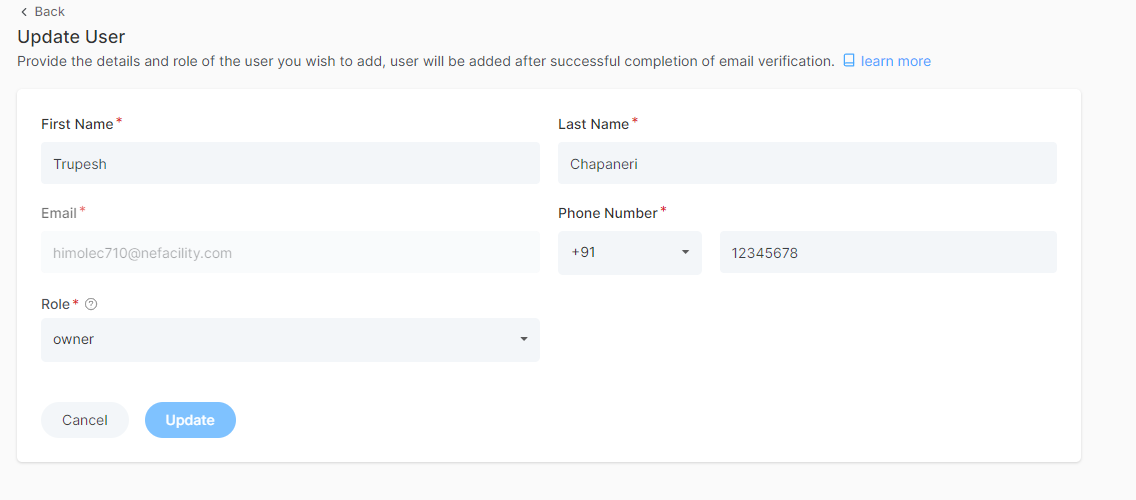
Change the Role Of Existing User
Need to promote someone or adjust their responsibilities? No problem!
Just go to Settings > My Organization > Users, click on your team member's name, and update their role. It's that simple!
Quick Note: Only admins and owners can make these changes to keep the team secure and organized.
Delete A User's Account
When you need to remove someone's access, just go to:
Settings > My Organization > Users and click the trash icon next to their name.
A pop-up will appear for the confirmation of deleting the User Account. Click on Delete
Create and Manage Teams in Omni24
Creating teams in Omni24 is like building departments that work together! Whether you have a sales team, technical support crew or billing specialists, we will help you set up teams that really operate.
Benefits of Setting Up Your Team
- Streamlined Collaboration - Multiple agents can collaborate seamlessly, sharing information and efficiently handling customer inquiries through a unified platform.
- Role-Based Access Control - Protect sensitive information and maintain security by assigning specific permissions and access levels to different team members based on their roles.
- Workload Distribution - Automatically distribute incoming chats and tickets among team members based on availability, skills, and department assignments to prevent agent burnout.
Create A Team
Step 1: Let's build your first team! Navigate over to Settings > My Organization > Teams > Add Team.
Step 2: A new page appears as Add Team. Enter all the details required to create a team
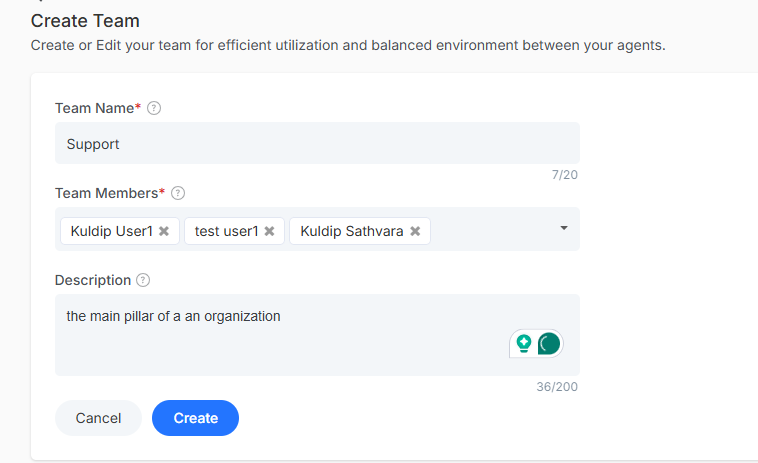
Here's how you'll set up:
- Team Name - Something clear and concise, like "Technical Support" or "Sales Team"
- Team Members - Add the agents who belong in this team
- Description - A quick note about the team to help everyone stay clear
Note: The team name you can enter up to a limit of 20 characters, and for description, a maximum of 200 characters
Hit Create and you're all set!
Edit Existing Team
Step 1: Need to make changes in your existing team? Navigate to Settings > My Organization > Teams
Step 2: Click on the team you want to update. Make your changes, and hit Update
Remove A Team
Sometimes teams change or merge within your organization. When you need to delete one,
Go to Settings > My Organization > Teams and click the dustbin icon next to the team name that you want to remove
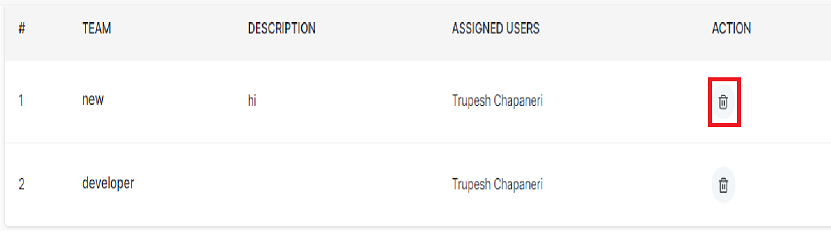
A confirmation pop-up will appear. Click on Delete to permanently remove it.
What's Next?
Now that your teams are organized, let's get the right agent in the right team and make sure your customer information works exactly it is needed
- Customer List: Capture the details that help your team shine
- Learn more about role and Permissions: Fine-tune roles and responsibilities of each team member.