
The Customer List in Omni24 is your central hub for managing all contacts and activities. Let's guide you to navigate, customize and organize your contact database effectively to enhance team collaboration and customer service.
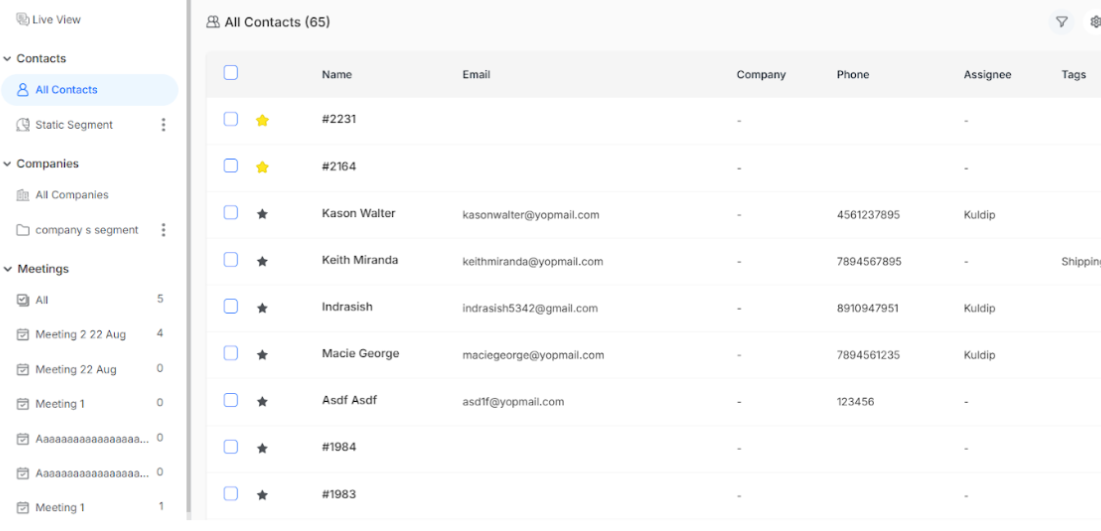
Contact List Dashboard
It is the centralized view of all your customer contacts with quick access to profiles, filtering options and bulk actions. The user-friendly interface allows you to manage all contact information efficiently while maintaining organized communication records.
Filtering Contacts
Use filters to narrow down your contact list and find specific segments efficiently. You can organize contacts based on various criteria for targeted interaction and analysis.
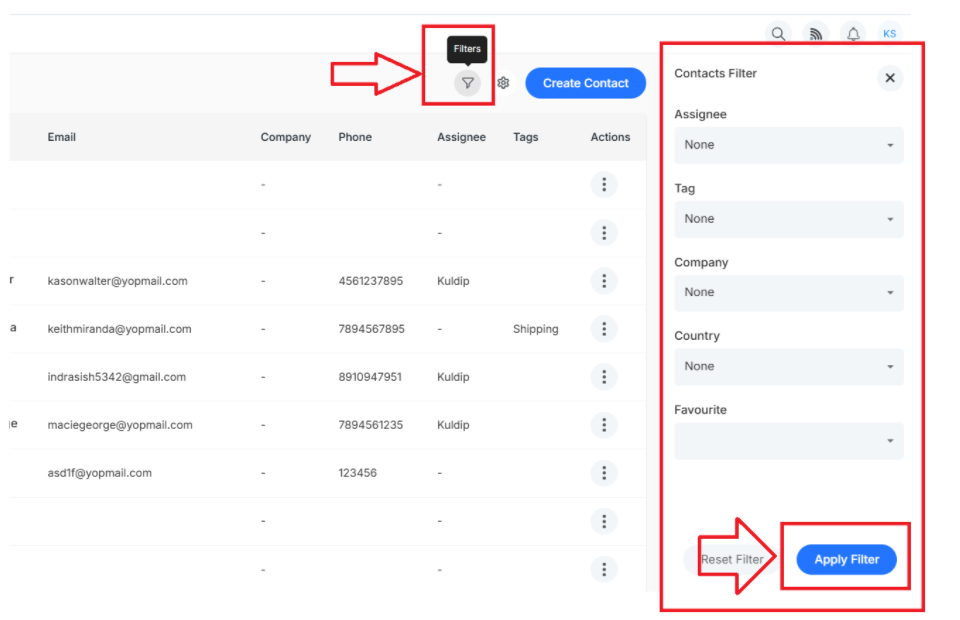
Available Filter Options
- Assignee: Filter contacts by the members who are responsible for managing the relationship.
- Tag: list out contacts based on tags assigned for a categorized organization.
- Company: View all contacts associated with a specific business or organization.
- Country: Filter customers by their geographical location for regional targeting and specific communication
- Favourite: Access your marked priority contacts for easy reference and follow-up.
Import and Export Options
The import feature allows you to upload a contact list in bulk from CSV or Excel files, which saves significant time when migrating or adding multiple contacts. It ensures that your contact database is always up-to-date.

Note: To know in detail how to import and export contacts, access here.
The export function enables you to download the complete contact list in CSV format for reporting, backup, or analysis purposes. This ensures you always have access to your data outside the platform when needed.
Bulk Delete Option
Bulk delete is essential for maintaining a clean and relevant contact list by removing outdated entries efficiently. It saves time compared to deleting contacts individually to help you maintain data cleanliness.
To perform a bulk delete, select multiple contacts using the checkboxes on the left side of each contact row
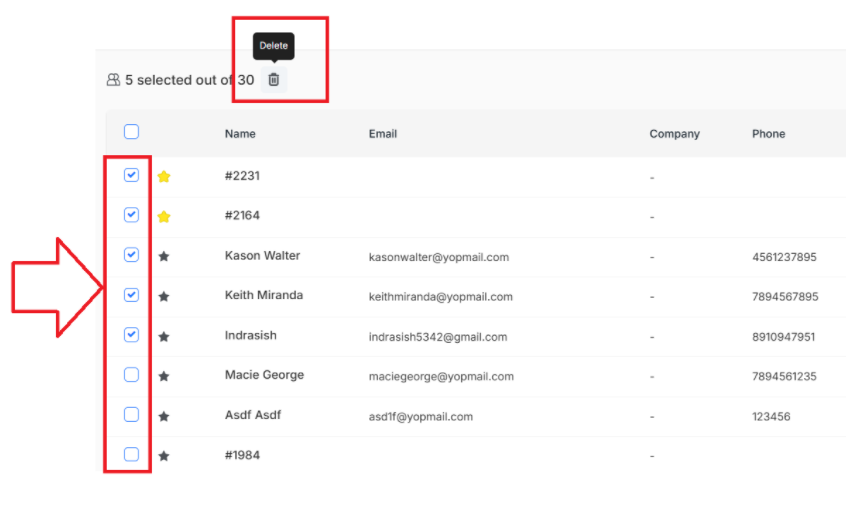
Click the delete icon that appears in the action bar.
Create Contact
The Create Contact feature enables you to manually add new contact profiles, along with their associated information, ensuring that your team can access them for personalized interactions. It is beneficial when customers reach out through offline channels or when you need to add prospects to your database.
How to Create a New Contact
Step 1: Click on the Create Contact from the main dashboard menu.
Step 2: Fill in the contact details in the form that appears:
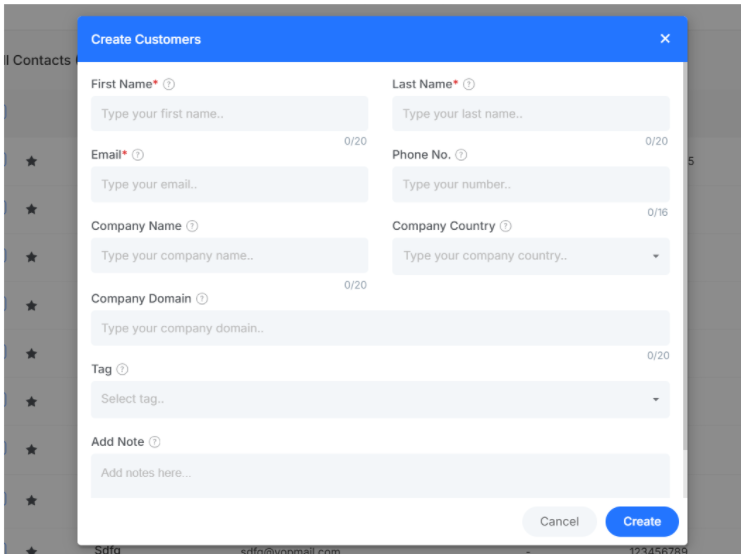
- First Name: Enter the contact name for personalized communication and primary identification.
- Last Name: Add the customer's surname to complete their full identification.
- Email: Provide the customer's primary email for digital communication.
- Phone No.: Enter the contact number for SMS communication when urgent support needs.
- Company Name: Specify the business the contact is associated with represents for relationship mapping.
- Company Country: Select the nation where the customer's company is based for regional insights.
- Company Domain: Add the company's website domain to the additional business context.
- Tag: Assign relevant tags to categorize contacts for filtering and segmented communication.
- Add Note: Include any important observations for team reference and context.
Click the Create button to save the new contact profile.
Edit Contact Profile
Just head to CRM > All Contacts List and click on any customer's name to start customizing their profile.
Profile Fields you can edit are:
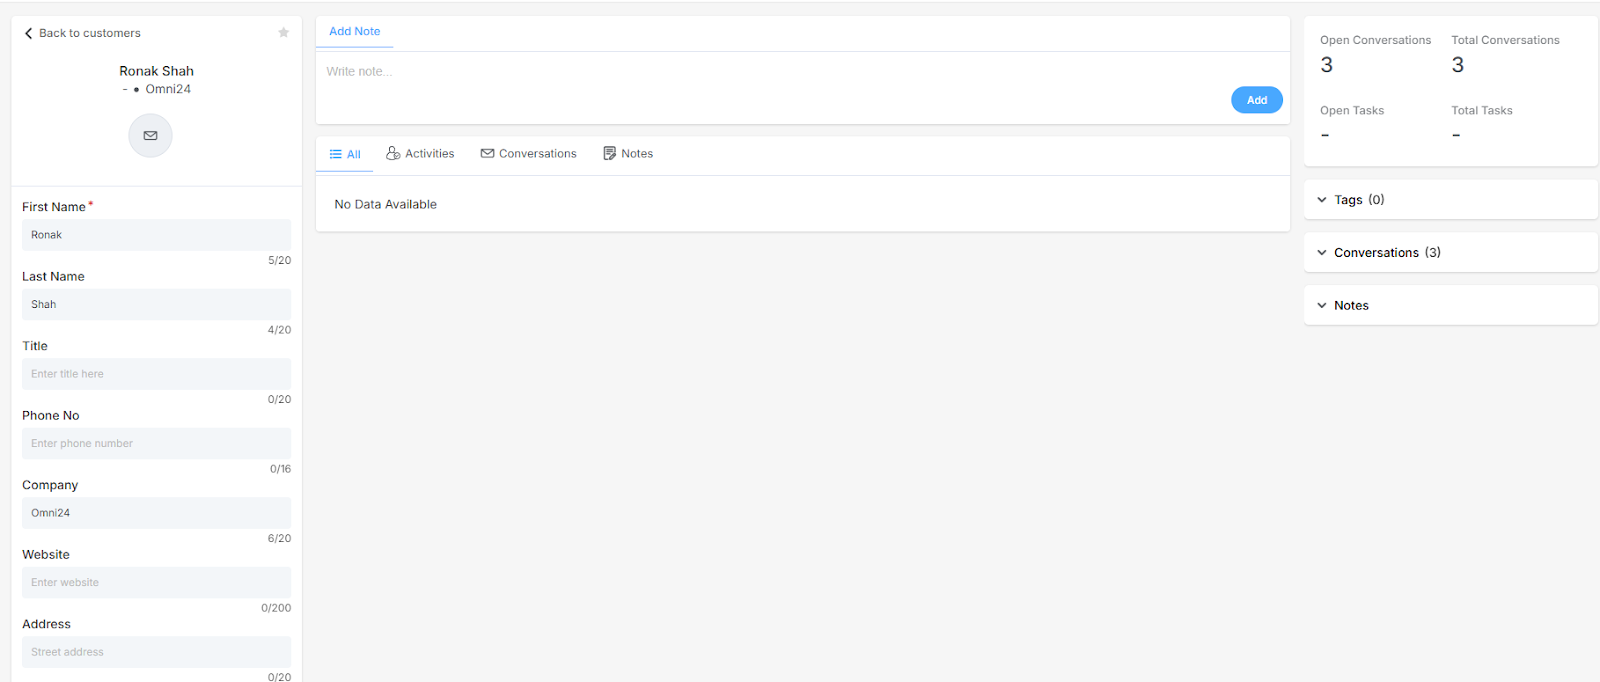
- First Name: Primary identifier that captures the customer's given name for personalized interactions.
- Last Name: Records the customer's surname or family name for complete identification.
- Company: Documents the business or organization where the customer is employed or affiliated.
- Job Title: Understanding their role helps you speak their language.
- Email: Their main contact point for updates and follow-ups.
- Phone: Direct line for urgent matters or SMS updates.
- Website: Get context about their business or personal projects.
- Address: Helpful for location-specific support or shipping questions
- Country: Identifies the nation where the customer is based for regional support and localization.
- Locality: Specifies the customer's city or local area for targeted service delivery and support.
Add Tags To Contact Profile
You can add tags to any of the customer profiles so that it will be easier for you to find a customer under defined tags by using filters.
- Navigate to CRM from the main menu and click on a profile you want to add a tag.
- Click on the tag icon on the right-hand side of the customer profile
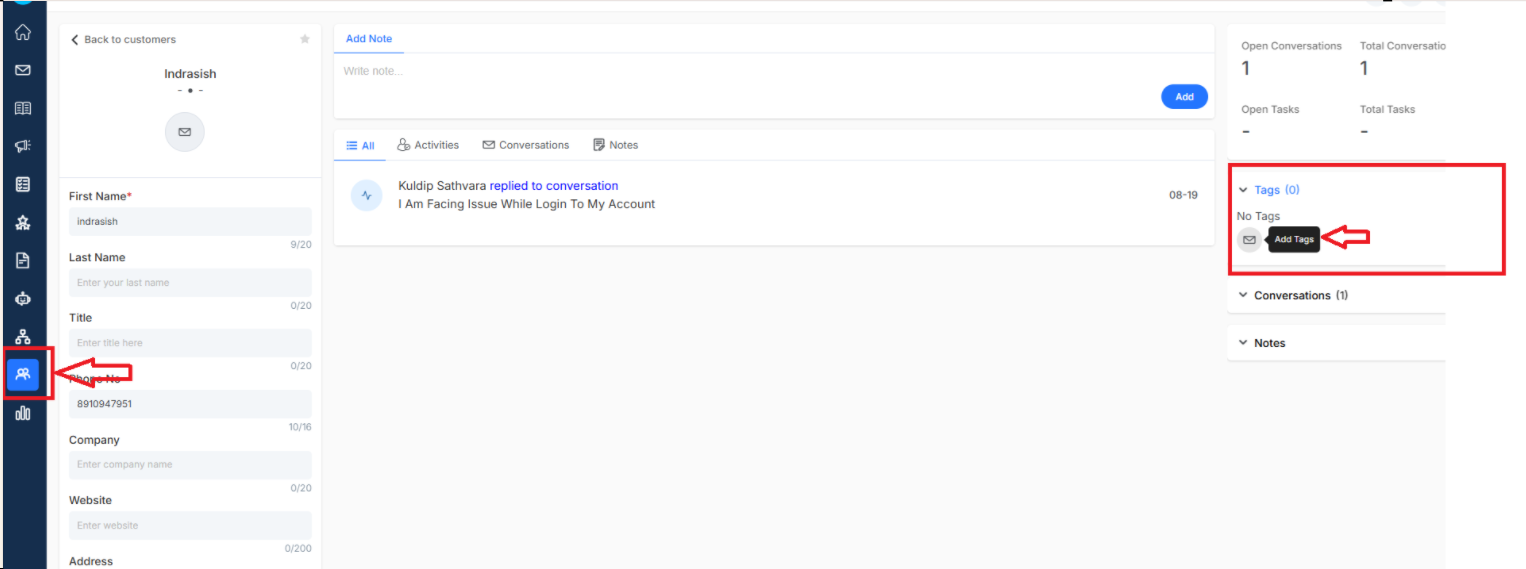
A list with all tags will appear. You can select the tag that you want to assign to the profile. To know how to create and manage tags. Click here
Add Notes to Contact Profile
Notes are a very important field as they help to add general notes to ensure communication details are documented and easily accessible to all team members.
To add Notes, type your text under the notes section within a customer profile
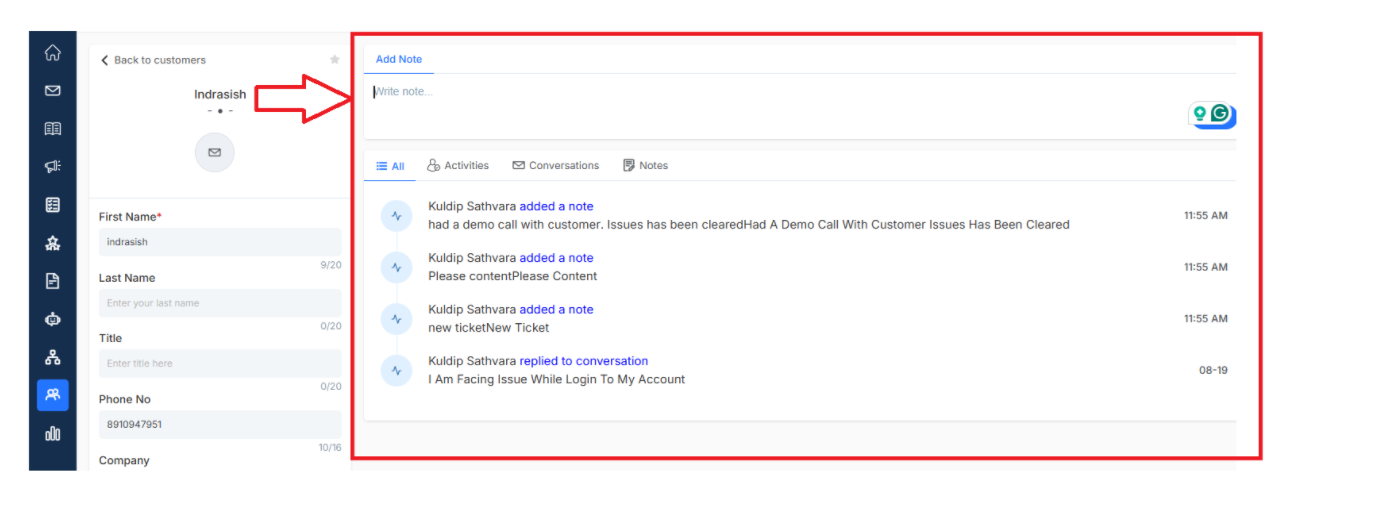
Once done, click Enter. You can view all notes added within a customer profile in one place to have a clear context