
The Contact Form feature lets you create a customizable web form that captures visitor information for your team to respond. Whether someone needs support or has a sales question, with it, you get customer messages. This article will guide you to create a contact or a feedback form.
Step 1: Setting Up Your Contact Form
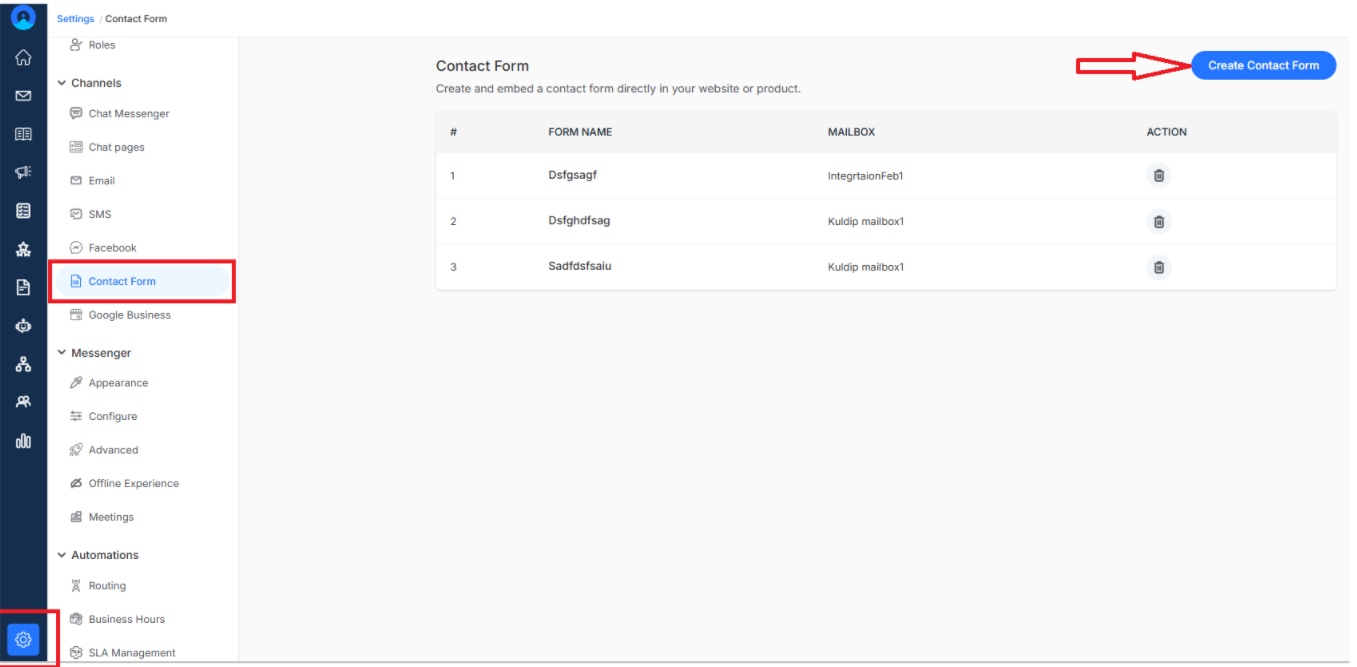
- Navigate to Settings from the main dashboard menu
- Click on the Contact form under the Channels section
- Click on Create contact form
Step 2: Set up your contact form
- Form Heading – Main title displayed at the top of your contact form, "Contact Us" or your company name
- Form Subheader – Secondary text beneath the heading, for additional context for visitors
- Email Query Inbox – Choose which inbox will automatically collect all form submissions
Configure Your Customer Information Fields
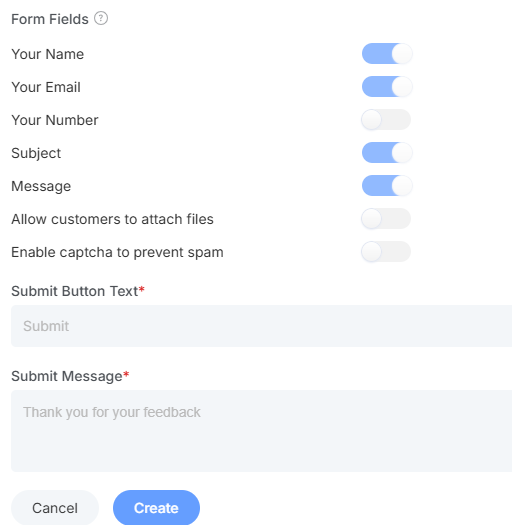
These are the fields your customers will fill out:
- Name: Visitors enter their name so you can respond professionally.
- Email: Captures their email address for detailed responses or follow-up when needed.
- Phone Number: Visitors who prefer phone calls.
- Subject: Help visitors categorize their inquiry briefly.
- Message: customers can explain their questions in detail.
- File Attachment Option: Let customers upload files to explain the question.
- Submit Button Text: Engaging button text. Make it feel action-oriented
- Confirmation Message: Warm thank-you message that visitors see after submitting
Once done, click on create.
Embed Your Contact Form
You will get a snippet of code that you can easily embed on any page of your website.
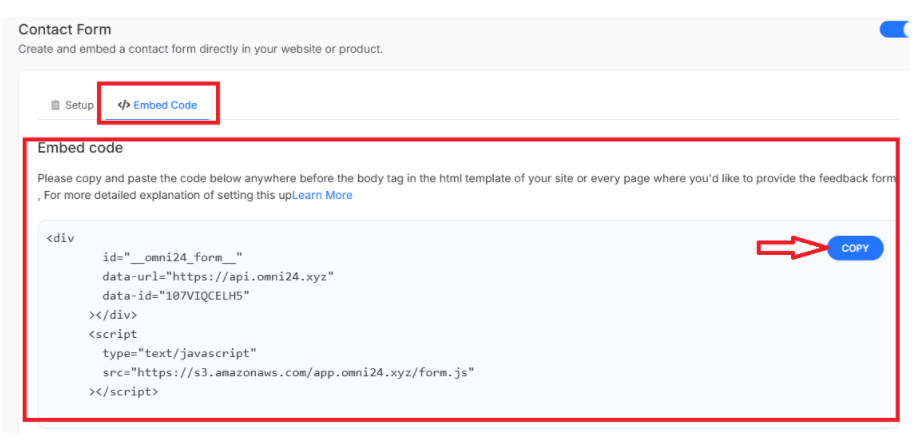
- Copy the provided HTML code
- Paste it wherever you want the contact form to appear
Note: you can paste the code in any page, like a dedicated contact page, your footer, or even in blog posts.
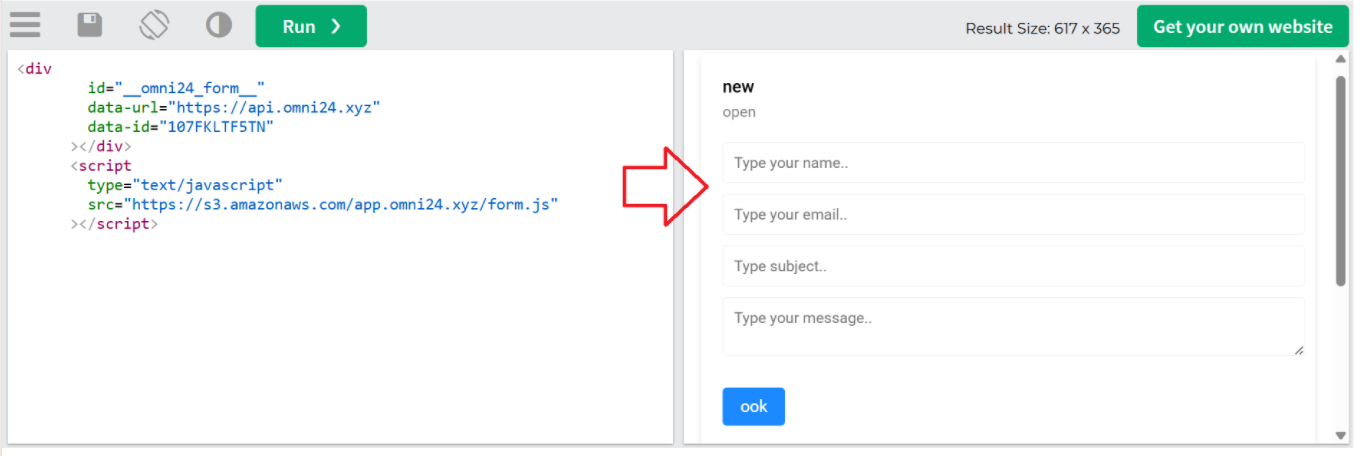
Once the code has been added to the body tag of any website or interface, it will appear as something like below. Here, we have used an online compiler but will appear the same for all other interfaces
What's next? Let's keep building your comprehensive customer communication tool
- Create a Chat survey - Get feedback after chat conversations