
SLA policies help you set clear response time goals and automatically learn how well your team is achieving. It is like your friendly coach tracking and alerting you before deadlines so that customers get faster service and improve their overall experience.
Key Benefits:
- Get automatic alerts that notify your team before deadlines slip by, so you can prevent it from escalating.
- Real-time performance monitoring helps identify bottlenecks and optimize staffing levels for better customer service.
- Customizable rules and priorities ensure critical issues receive faster attention while maintaining service standards for all tickets.
Creating Your SLA Policy
Step 1: Find the Way There
- Navigate to Settings from your main dashboard
- Scroll down to the Automation section. This is your productivity zone
- Under SLA Management, click Add SLA to create your first SLA
Step 2: Build Your Service Commitment
- A Create SLA Policy page will open up
- Now comes the important part, set up your response time for each priority level
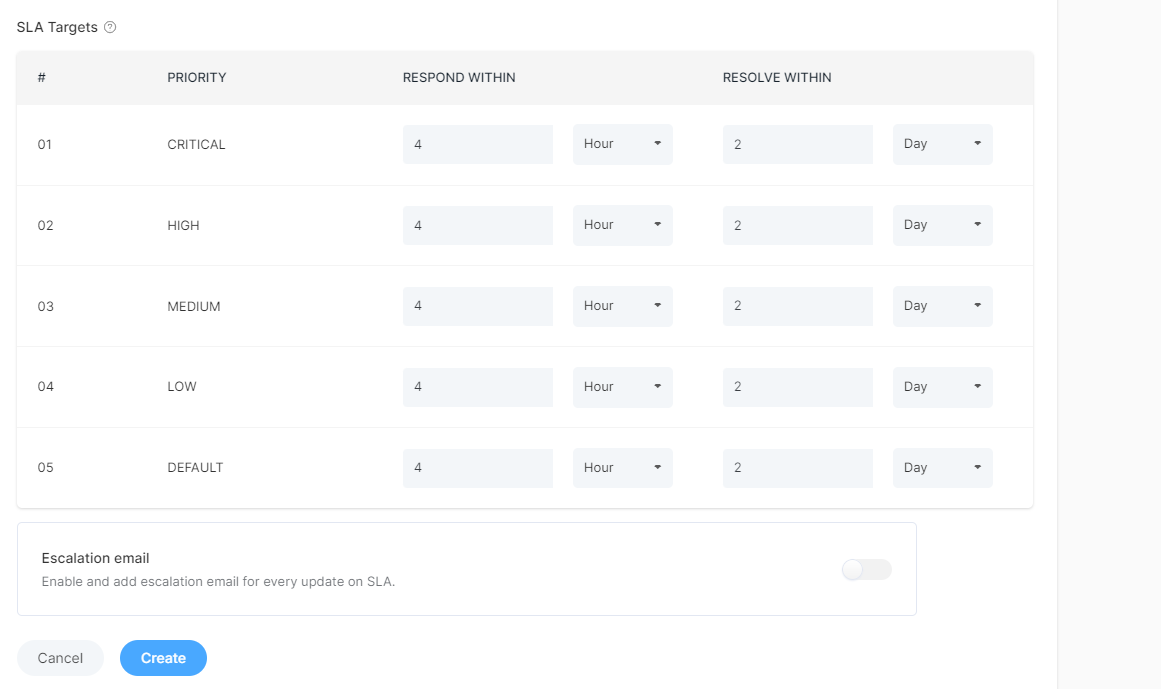
SLA Targets: Choose the priority level for each target based on what your customers need.
For example,
- Critical issues can get a 15-minute response time and a 2-hour resolution
- General questions can get responded to within 4 hours and resolved within 24 hours
Escalation Emails
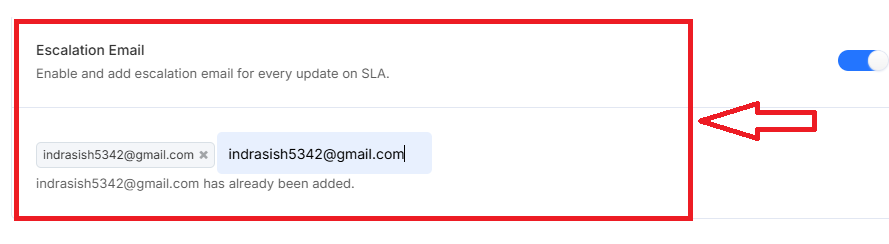
Enable the Escalation Email feature and add an email address to receive updates about your SLA escalation. This way, you'll always be aware of performance and be able to jump in and help when needed.
Delete an SLA
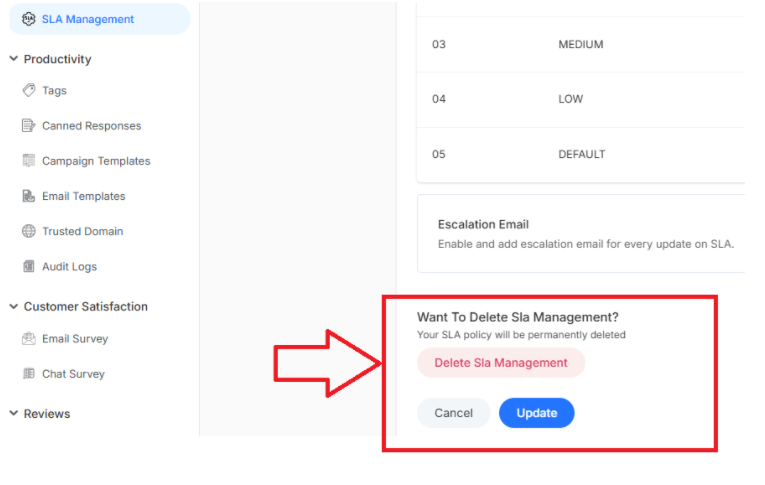
To delete an SLA, click on Delete SLA. This action will permanently delete and cannot be recovered
What's Next? Let's keep building your customer service excellence:
- Create routing rules - Automatically direct tickets to the right team members so your SLA targets are always achievable