
Ensure your customers can always reach you by setting up offline messaging capabilities that capture details when your team is unavailable. Configuring trusted domains adds an essential security to prevent unauthorized use of your chat messenger while maintaining seamless communication across verified websites..
Setting Up an Offline Experience for Chat Messenger
How to set up Trusted and configure your chat messenger for offline mode when out of business hours
Offline experience setup ensures seamless communication across live chat when your agents are unavailable. During offline periods, chat messenger will display custom predefined messages and capture visitor information through forms while providing estimated response times to maintain consistency, as well as managing visitor expectations.
Benefits of Offline Experience:
- Maintains continuous customer engagement by collecting inquiries even during offline hours, preventing lost business opportunities.
- Reduces visitor frustration by setting clear expectations about response timing and alternative contact methods.
- Strengthens brand professionalism with consistent messaging and automated responses during non-operational hours.
Setting Up Your Offline Experience
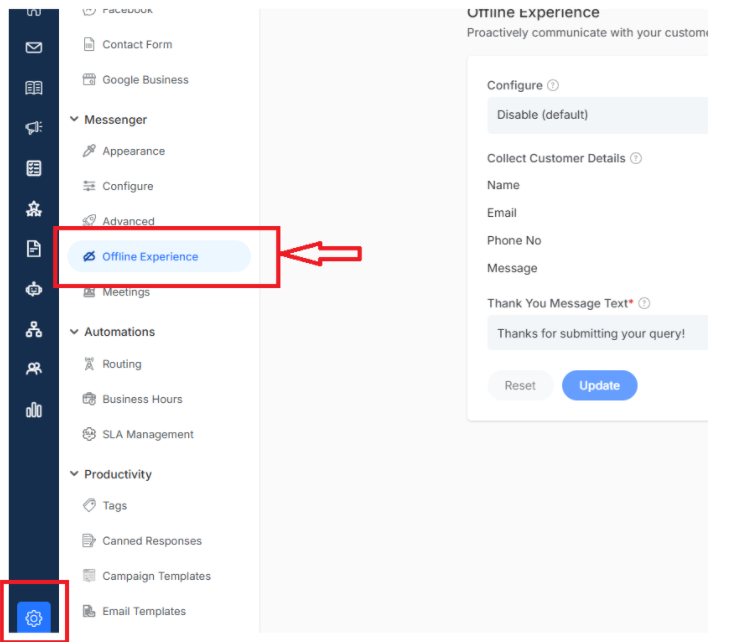
- To activate the offline experience, navigate to Settings from the main dashboard menu
- Scroll to the Messenger section
- Click on Offline Experience.
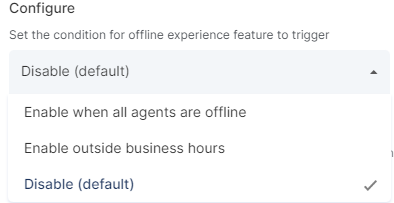
Choose When to Go Offline
Pick the condition for when your offline experience should start:
- Enable When All Agents Are Offline: Perfect for when your entire team is unavailable to ensure visitors are not ignored
- Enable Outside Business Hours: Automatically switches to offline mode when your business day ends.
 Click
Click
Want to learn about smart automation? Click here to explore workflow
Customer Details
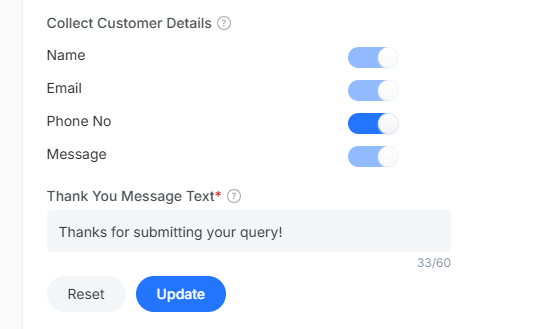
When your helpdesk is offline, collect customer information and queries so that whenever your agents are available, they can revert back
- Name – So that you can greet customers personally when you respond
- Phone Number – For urgent matters that need a quick call
- Email – Your primary way to follow up
- Message – Customers explain exactly what help they need
Set up a friendly message that visitors see after successfully submitting their information.
Note: As soon as your business hours end or when all regents are inactive, then your offline experience starts within the web-chat interface
How To Add Trusted Domain
Omni24 enables businesses to seamlessly integrate chat messenger into their websites by configuring custom domain settings. This ensures brand consistency, enhanced security, and professional appearance while maintaining smooth communication between visitors and agents through a trusted domain environment.
Step-by-Step Domain Addition Process
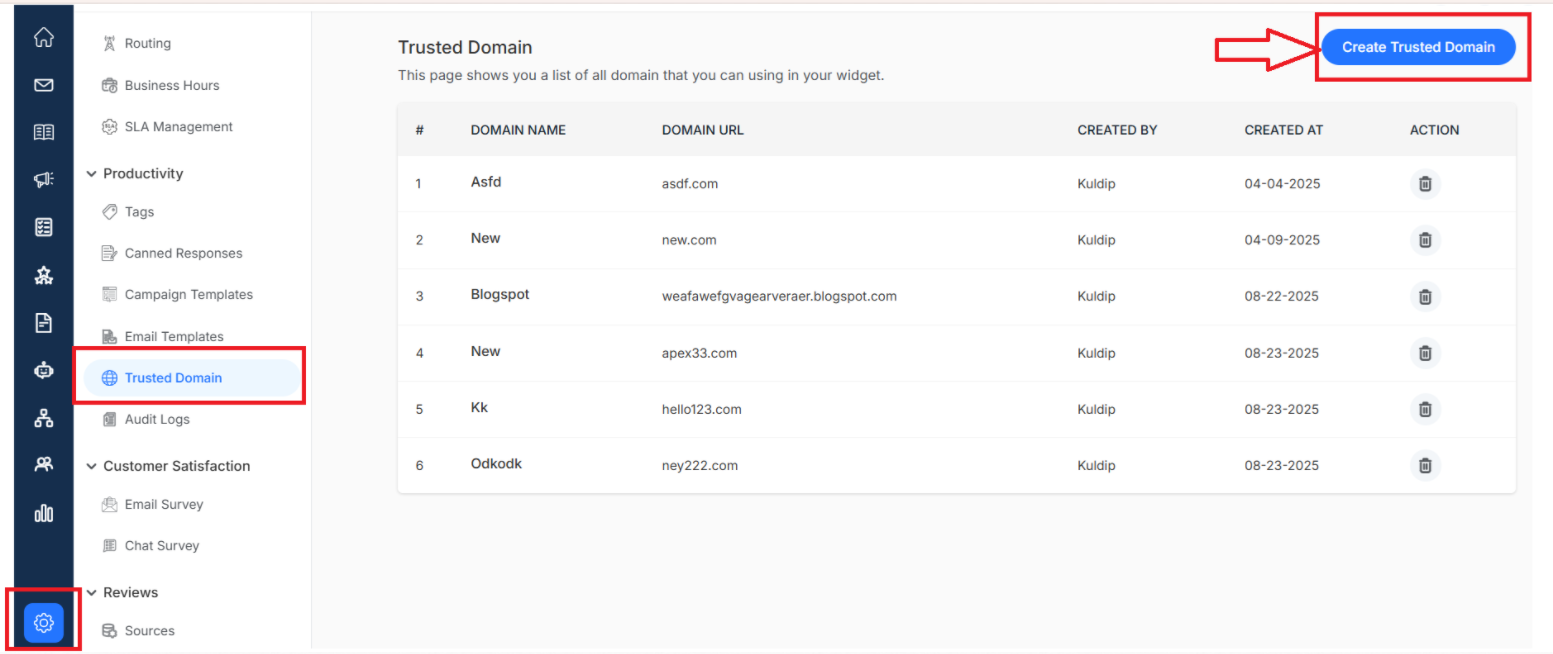
Step 1: Navigate to Settings
- Head to Settings from the left side of your main navigation menu.
- Scroll down to find the Productivity section.
- Click on Trusted Domains to open your domain authorization interface.
Step 2: Initiate Domain Addition
- New page opens to create a Trusted Domain where you have to add the details.
Step 3: Configure Domain Details
Complete the required information to establish trust with your website URL:
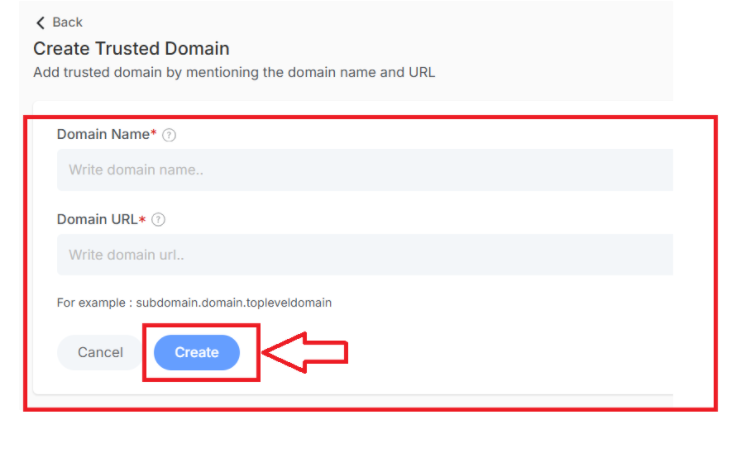
- Domain Name: This field represents the custom domain/subdomain name you want to use for hosting your chat messenger, ensuring brand consistency and recognition.
- Domain URL: The complete web address (URL) where your chat messenger will be hosted.
Once done, click on Create and you have successfully added a Custom domain.
Note: Ensure the URL format matches exactly how visitors access your website.
Removing Trusted Domains
When you no longer need a domain authorized for the chat widget
Click the delete icon (trash can symbol) next to the domain name to remove it from your list.
Note: This will immediately revoke the domain's authorization to display your chat messenger interface.
Understanding Trusted Domain Requirements
Before your chat messenger widget can appear on any website, Omni24 needs to verify that the domain is authorized to display it or not.
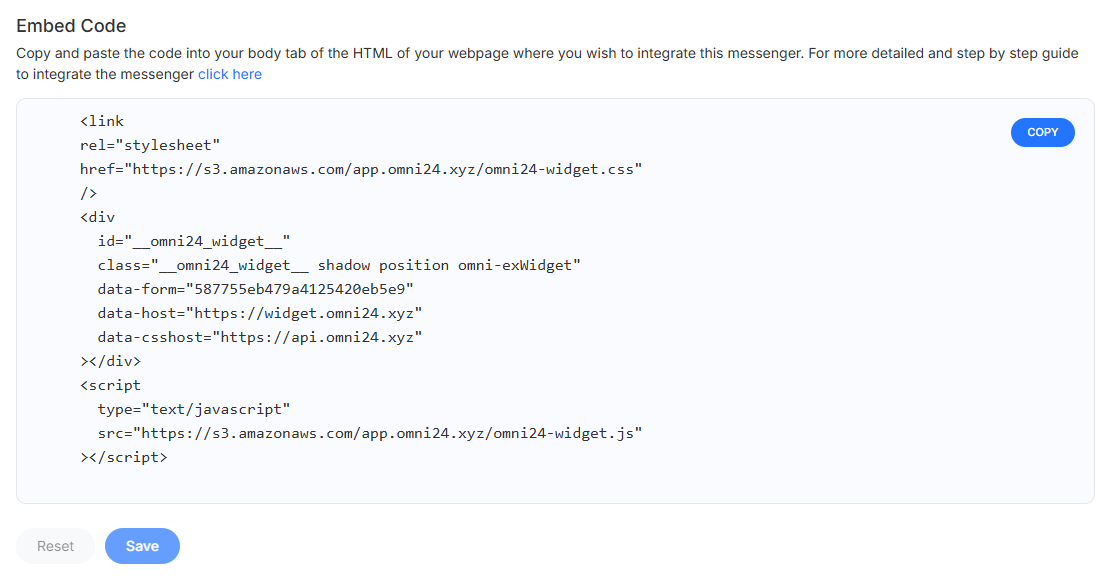
When you embed your chat messenger code into a website without first adding the domain to your trusted list, visitors will not be able to see the widget. Learn how to integrate chat messenger on your website
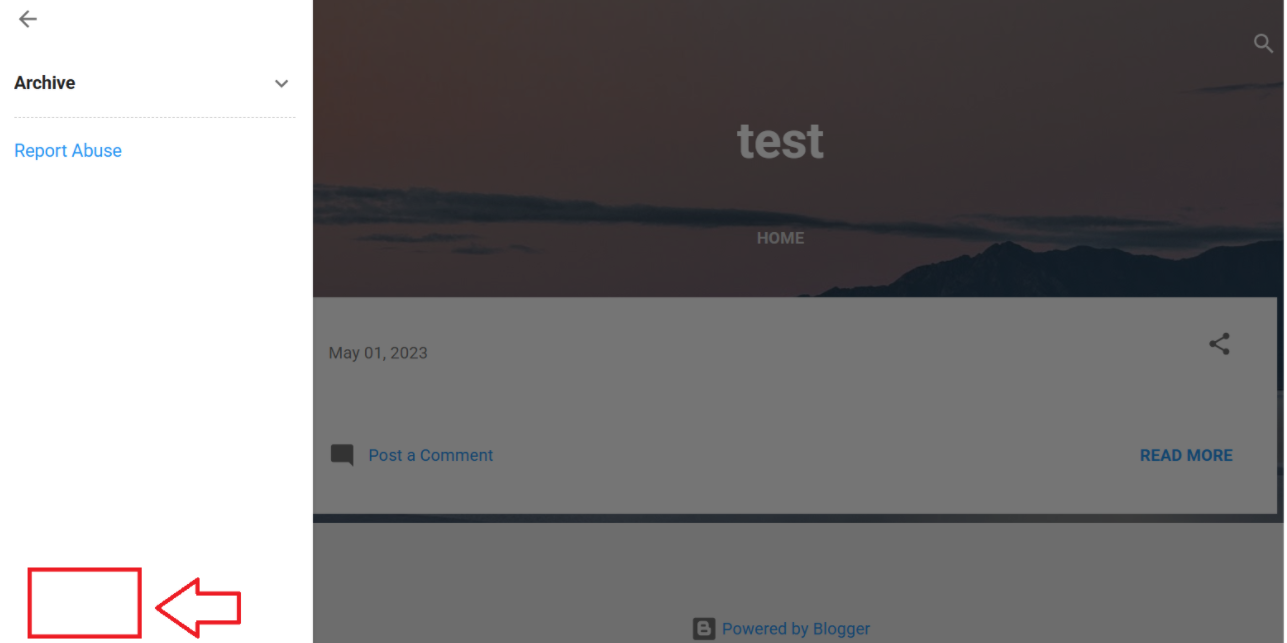
Before the trusted domain verification is not done, the website will look like
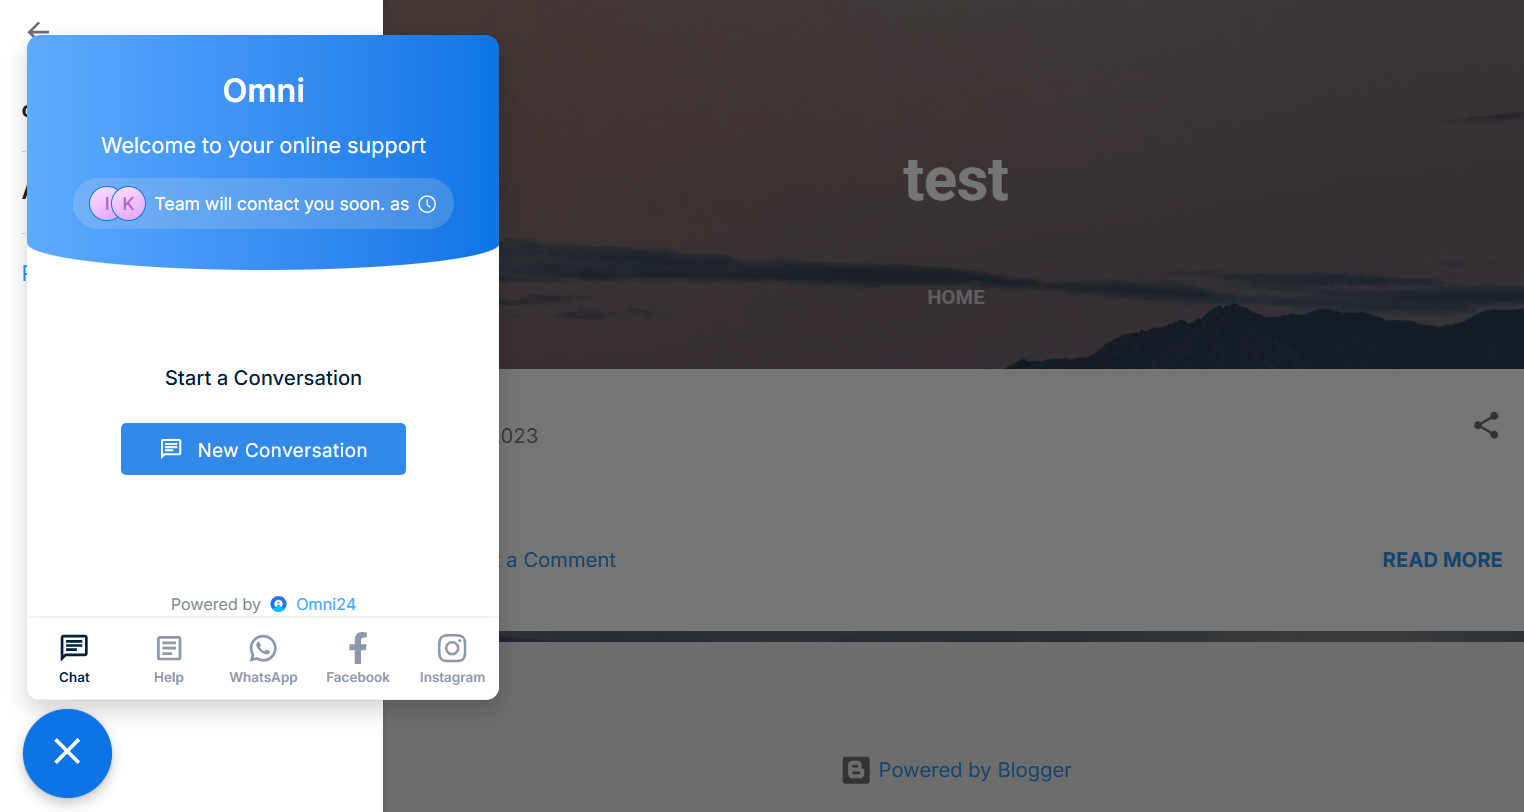
After the trusted domain is verified properly user can view the chat messenger on the website and it looks like.....okfof
What's Next? Complete your chat messenger integration
- Chat Messenger Customization - Personalize and customize your messenger appearance