
Transform your website's customer service experience by optimizing the chat messenger widget to match your brand identity and needs. It allows you to create a seamless integration that feels a part of your website and provides real-time engagement capabilities.
Changing the Appearance Of Chat Messenger
The Appearance Customization settings in Omni24 allow you to personalize your chat messenger interface to match your brand identity. You can customize colors, change button styles and pick the perfect position to create a seamless experience. Let's explore all the features available under Appearance.
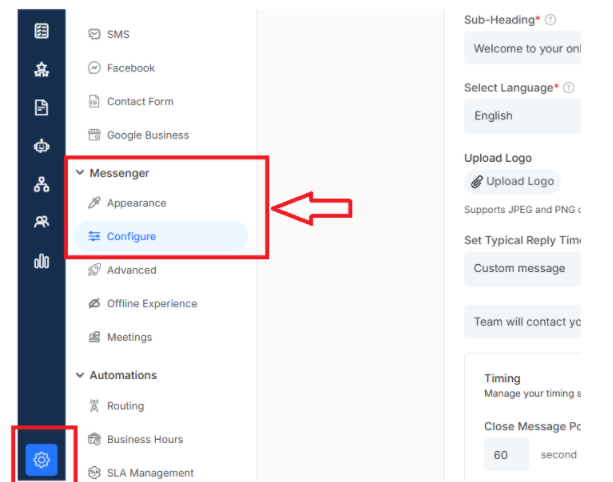
- To customize the appearance of chat messenger, navigate to Settings from the dashboard menu.
- Scroll down to the Messenger section and click on Appearance.
Customization
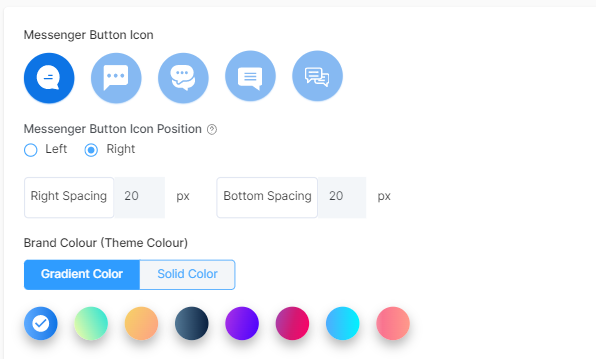
Messenger Button Icon
Choose from five different button icons to give your chat messenger a branded look. Each icon has its own personality, so pick the one that best matches. Click here to configure your chat messenger.
Messenger Button Icon Position
Decide where your chat icon appears on your website. You can place it in the bottom-Place it wherever it feels most natural and fits best with your site design.
Brand Color
Change your messenger's theme color to match your brand. Make it pop or keep it subtle – whatever feels right for your brand.
Connect All Your Channels
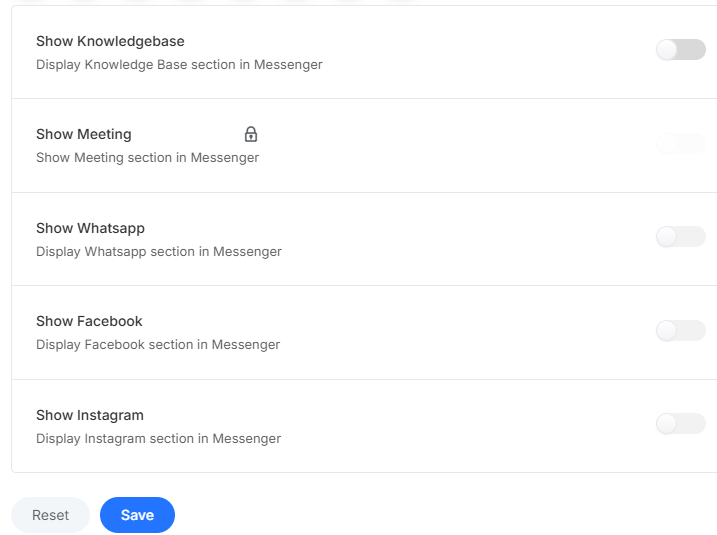
Knowledge base
Enable this feature and integrate the knowledge base directly into your chat messenger. Visitors can find answers instantly without leaving the chat.
Meetings
Turn this on so that visitors can schedule meetings directly from chat messenger without jumping between different tools. Click here to learn how to connect to Google Calendar
Social Media Integration
Enable WhatsApp integration so visitors can reach you on their favorite messaging platform.
- Just add your WhatsApp link
- Write a friendly message that visitors will see when they choose.
Need help setting this up? Learn how to connect with WhatsApp for detailed instructions!
Bring Facebook right into your chat widget by adding a link along with a welcoming message. Visitors can connect with you on their preferred channel.
Complete Setup of connecting with Facebook Messenger. Click here
Let customers connect through Instagram by adding a link along with a friendly message to improve customer conversations.
Configuration Of Chat Messenger
Chat Messenger configuration allows customization of the chat window's appearance, behavior, and functionality. You can modify names, logos, language, pre-chat surveys and other elements to match brand identity and requirements.
Getting started
- Navigate to settings from the main dashboard menu
- Under the Messenger section, click on Configuration
Configure your Messenger
Heading & Subheading
Create friendly messages like "Hi! How can we help?" with helpful subheadings underneath like "We typically respond within minutes."
Language & Logo
Choose the language of Messenger and upload your branded logo so customers instantly recognize it.
Response Expectations
Choose from predefined response time messages that represent your team's actual availability.
Note: This message appears after visitors send the initial conversations to help them understand when they can expect a response.
Available Response Time Options:
- Reply in Few Minutes - Immediate responses during active business hours.
- Typically Reply in Few Hours - same-day response for standard business hours.
- Typically Reply in Few Days - Longer response times for complex issues
- Do Not Show Any Message - Removes response time expectations entirely.
- Custom Message - Personalized text that reflects your specific support availability.
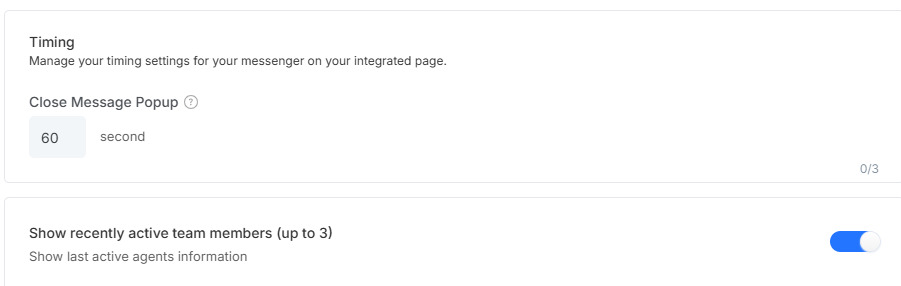
Timing & Team Display
Control pop-up timing and show the most active agents so customers can see real faces ready.
Conversation Management
Single Conversation Mode
Enable single conversation thread It reduces confusion and helps both your team and customers have more focused chats.\
Email Follow-Up
Make it super easy for customers to continue conversations by adding email follow-up options.
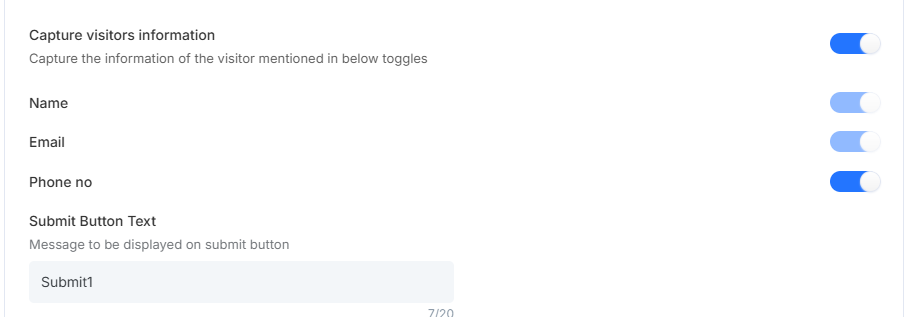
Visitor Information
-
- Visitor's Name: So that you can greet them personally and build rapport
- Email Address: For follow-ups and continued communication
- Phone Number: In case they prefer a quick call or have urgent needs
Click on Save to activate all your amazing customizations
Advanced Settings of Chat Messenger
Advanced Settings allows customization of the messenger's interface behavior and functionality. Whether you want to enable file sharing, sneak peeks of what customers are typing or ensure privacy regulations, you can tailor everything to exactly how you need.
Finding Your Advanced Settings
- Navigate to Settings from the main dashboard menu
- Click on Advanced from the Messenger section. You will have access to all customization options
Chat Customization Toolkit
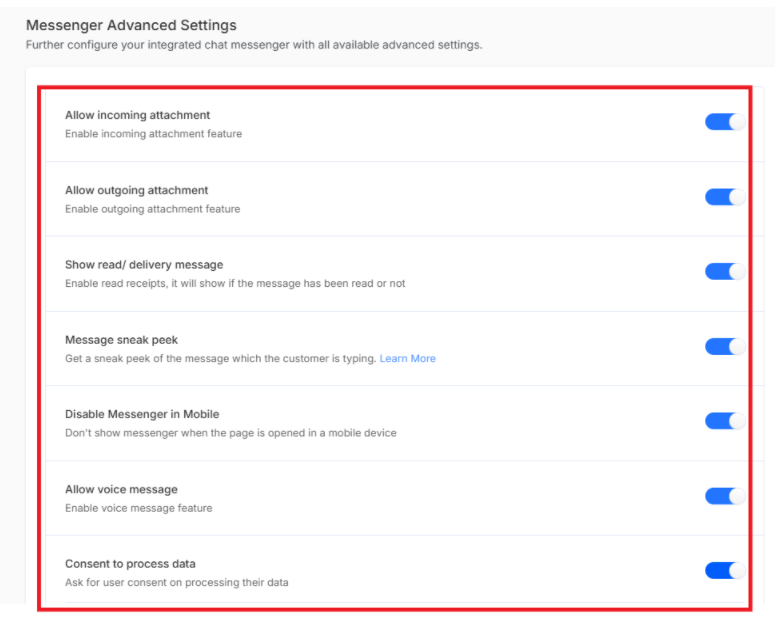
- Allow Incoming Attachments: Let your customers send you documents right through the chat. This is perfect when customers need to show you visual information for help.
- Allow Outgoing Attachments: Give your agents the power to share helpful resources with customers through chat. You can instantly share exactly what customers need!
- Show Read/Delivery Messages: Status indicators that show whether messages have been delivered and read by both you and your customers.
- Message Sneak Peek: Your agents can see what visitors are typing in real-time before they even hit send to help start preparing helpful responses, making conversations responsive.
- Disable Messenger on Mobile: Sometimes, you might want to offer different experiences for mobile users. This option lets you connect specifically with a customer to the mobile version.
- Allow Voice Message: Enable sending voice recordings directly through chat messenger for complex technical issues where verbal explanation can be clearer.
Privacy and Compliance Setup
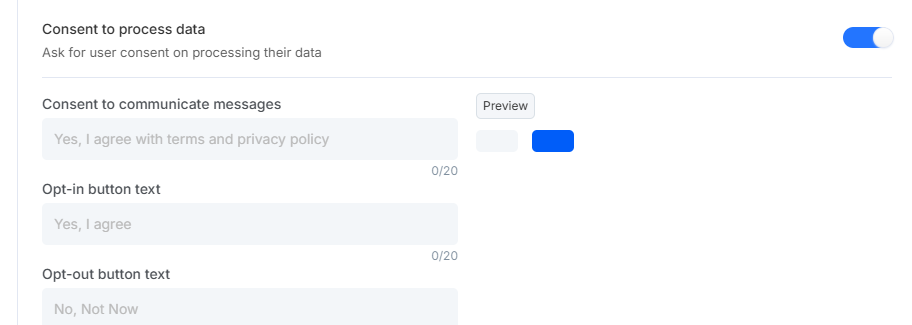
- Consent to Process Data: Stay compliant with privacy regulations by requiring visitors to agree to your data processing terms before they start chatting.
Note: It should explain how you will use their information while maintaining brand voice
- Consent to Communicate Message: Make sure visitors accept terms and conditions before engaging in conversations to set clear expectations.
- Button Text Personalization: Customize text that appears on consent buttons to match your brand tone and improve experience:
- Opt-in Button Text: Modify the acceptance button text to be more specific, like "I Agree" or "Accept Terms," for clearer intent.
- Opt-out Button Text: Customize the decline button text to respect their privacy preferences.
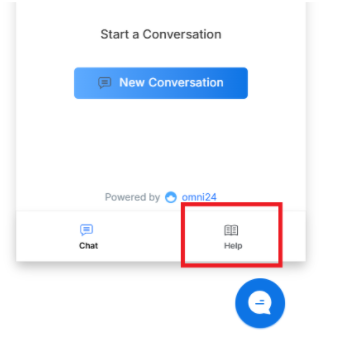
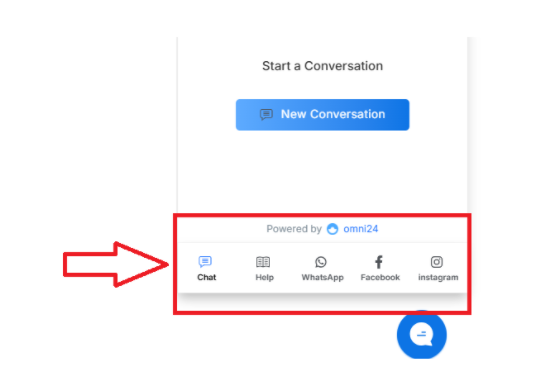
Once done, click on update to apply the changes. After applying all changes on your chat messenger, it will look something like this
What's next? Your chat messenger is getting more powerful! Let's set up an offline experience for chat messenger